Researching into developing technologies, such as 3D printing, has opened my eyes to a whole new area of innovation in sketching, that isn’t simply contained to a flat page. I think that this ability to literally ‘draw’ useable things- for example, clothing, using a ‘Fabrican’ spray can- has the potential to liberate many people from the mentality that they ‘can’t draw’ or design. As 3D printing technologies become more widespread; and rapid, physical outcomes can be created through human marks and gestures that are translated by computers; drawing and design has the potential to become accessible in a new way to all types of people, regardless of their skills, training, age and physical abilities/disabilities. If the cost of these processes fall, then perhaps new technologies can encourage further innovation and creativity- as people will only be limited by their imagination, at the type of sculptural, real-time, three-dimensional ‘drawings’ they can create.
Tuesday 23 December 2014
Evaluative report
This module allowed me to explore the definition of ‘sketch’- what classifies as sketching, and what can be considered as an ‘innovative’ approach to it. I looked at book-binding techniques and made some of my own books and a drawing ‘device’; as well undertaking drawing experiments and sharing some of my ideas with the group through a mini presentation.
I’ve learnt new technical terms and techniques related to making books- for example, a bone fold is used to create crisp paper folds, and a ‘signature’ is a group of 10 folded sheets within a book. I also picked up some basic movie-making and editing skills to record and present my drawing device experiments. Presenting sketchbooks from my current textiles practice with the group, and receiving positive feedback from them, helped me see the value in each step of my creative process. This led me to include some of my development sketches in my final lookbook for my textiles assessment, effectively helping to communicate the flow of my ideas from my initial inspiration to my final pieces. It was discussion in this module about how interesting it is to see the journey of ideas that are recorded by sketching, that prompted me to display my process drawings like this, and at our exhibition many people commented on how cohesive my work felt- so I’m grateful for the influence of this TOP on how I developed my studio project!
I enjoyed looking at my peer’s sketchbooks and specialism work, as this is the first cross-course module I’ve experienced. Being exposed to different styles of working helped me become more relaxed and experimental in my own work. For example- when I made my drawing device, I tested lots of different variations, rather than just trying it once. I enjoyed the freedom to fail- as innovation often happens through mistakes and unintentional outcomes. This sense of freedom then helped me in my textile practice work when I was creating my final jewellery pieces- I spent a week experimenting with placements and photographing them all- and all my final designs developed out of those experiments. It was also exciting to see other people’s approaches to tasks, for example Winnie’s bin drawings. I felt really inspired by this concept of using a mundane action to create something beautiful; as I’m interested in organic/recycled approaches to design, I feel like this could inspire future work in my practice.
After learning some basic bookbinding skills, I could improve by developing these further. I didn’t have time to try out all the techniques I researched, such as Japanese ‘stab-binding’, so it would be a good challenge to continue with this. I could also improve my time-management, as at points I researched or visited/saw things that inspired me for this module, but I couldn’t record or blog about them all, as I needed to split my time between my textiles work and other commitments, too. This module has also made me keen to work with people from other disciplines again- there is so much to learn from other areas of design, so I shall try to remain attentive to what people from different practices are doing. If I could change anything about the course, I’d add in a 'book-make-along' where people each present different bookmaking techniques, and everyone tries them out together. (Blue Peter style!)
Researching into developing technologies, such as 3D printing, has opened my eyes to a whole new area of innovation in sketching, that isn’t simply contained to a flat page. I think that this ability to literally ‘draw’ useable things- for example, clothing, using a ‘Fabrican’ spray can- has the potential to liberate many people from the mentality that they ‘can’t draw’ or design. As 3D printing technologies become more widespread; and rapid, physical outcomes can be created through human marks and gestures that are translated by computers; drawing and design has the potential to become accessible in a new way to all types of people, regardless of their skills, training, age and physical abilities/disabilities. If the cost of these processes fall, then perhaps new technologies can encourage further innovation and creativity- as people will only be limited by their imagination, at the type of sculptural, real-time, three-dimensional ‘drawings’ they can create.
Researching into developing technologies, such as 3D printing, has opened my eyes to a whole new area of innovation in sketching, that isn’t simply contained to a flat page. I think that this ability to literally ‘draw’ useable things- for example, clothing, using a ‘Fabrican’ spray can- has the potential to liberate many people from the mentality that they ‘can’t draw’ or design. As 3D printing technologies become more widespread; and rapid, physical outcomes can be created through human marks and gestures that are translated by computers; drawing and design has the potential to become accessible in a new way to all types of people, regardless of their skills, training, age and physical abilities/disabilities. If the cost of these processes fall, then perhaps new technologies can encourage further innovation and creativity- as people will only be limited by their imagination, at the type of sculptural, real-time, three-dimensional ‘drawings’ they can create.
final session
I enjoyed our final sketch innovation session- although it's sad to think the module is now over. There's so much still to develop and learn about book binding (and so many little books I want to make and use!), but at least now I've been introduced to the basics, and am armed with my bone fold, I am ready to continue on with book-making adventures after this unit.
This session we reflected on things we've done, and wrote out our own self-evaluations. Although this has only been one term, we've covered quite a lot of ground in our sessions. I'm really glad I picked this TOP module- I've really valued the chance to explore and experiment. And especially when things got a little stressful in the studio with textiles deadlines and work to be done for my project, it was great to have this as a different sort of creative outlet. I didn't feel stressed during this module- I felt like I had the freedom to try things out, and take them to whatever extent I wanted to. I've been thinking a lot about the creative process, and how failures and unexpected outcomes often lead to great work- so I am hoping to carry through this mindset into my textiles work again, because I always want to be having fun and surprising myself with what I do. I've enjoyed getting back to basics and rethinking again for myself what 'sketching' and 'innovation' even mean. It's good to place value on all stages of the creative process- because if it wasn't for little doodles in the back of a sketchbook, and scrawly ideas scribbled out over scrap pieces of paper that get taped into my research files, my projects would never reach their end points. I am leaving this module with a renewed appreciation for the way ideas develop and take us on a journey from our initial inspiration, to final outcomes. I'm really grateful that I got to take this module- even if I did get lost on my way to the room pretty much every week of the term, ha!
This session we reflected on things we've done, and wrote out our own self-evaluations. Although this has only been one term, we've covered quite a lot of ground in our sessions. I'm really glad I picked this TOP module- I've really valued the chance to explore and experiment. And especially when things got a little stressful in the studio with textiles deadlines and work to be done for my project, it was great to have this as a different sort of creative outlet. I didn't feel stressed during this module- I felt like I had the freedom to try things out, and take them to whatever extent I wanted to. I've been thinking a lot about the creative process, and how failures and unexpected outcomes often lead to great work- so I am hoping to carry through this mindset into my textiles work again, because I always want to be having fun and surprising myself with what I do. I've enjoyed getting back to basics and rethinking again for myself what 'sketching' and 'innovation' even mean. It's good to place value on all stages of the creative process- because if it wasn't for little doodles in the back of a sketchbook, and scrawly ideas scribbled out over scrap pieces of paper that get taped into my research files, my projects would never reach their end points. I am leaving this module with a renewed appreciation for the way ideas develop and take us on a journey from our initial inspiration, to final outcomes. I'm really grateful that I got to take this module- even if I did get lost on my way to the room pretty much every week of the term, ha!
more book-making
So I made a few more books! (but now since my last post, I want to try making a star fold book too, haha! Ah well, it's always good to be inspired to make more, isn't it!)
Here's a few pictures of my process, and then the finished books themselves. I wanted the books to reflect my work, so I was playing around with hand making/personalising covers using techniques from my textile projects.
cutting pages to begin!
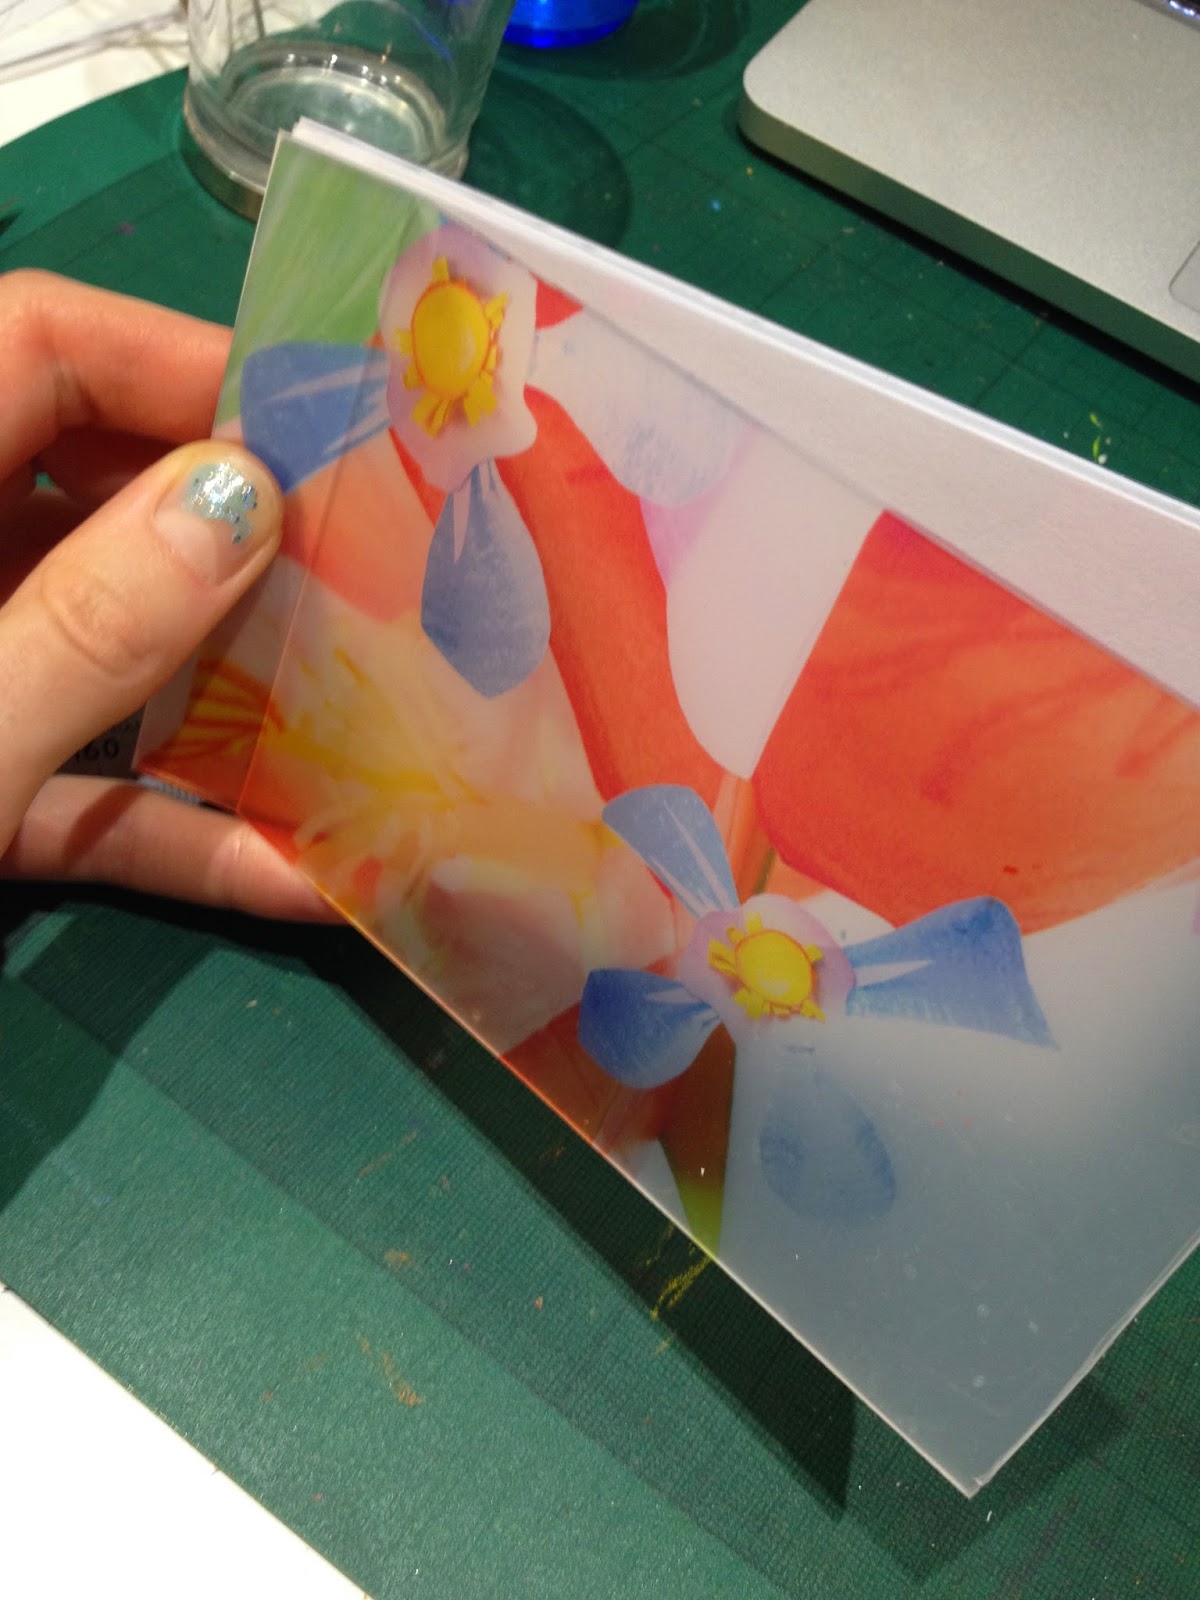
 Here I transfer printed sections of one of my flower prints onto Polypropylene plastic to create a rigid, yet flexible cover. I'm pleased with how the print has come out!
 Scoring the cover front and back, so that it can open in a flexible way to make the inside pages useable!
 Measuring across the spine of the book to work out where to punch holes through. This stage took a lot of focus and patience, as my hole punch is rather small and could only just fit one side of the cover, and then a few pages at a time inside- thankfully it all lined up in the end though!
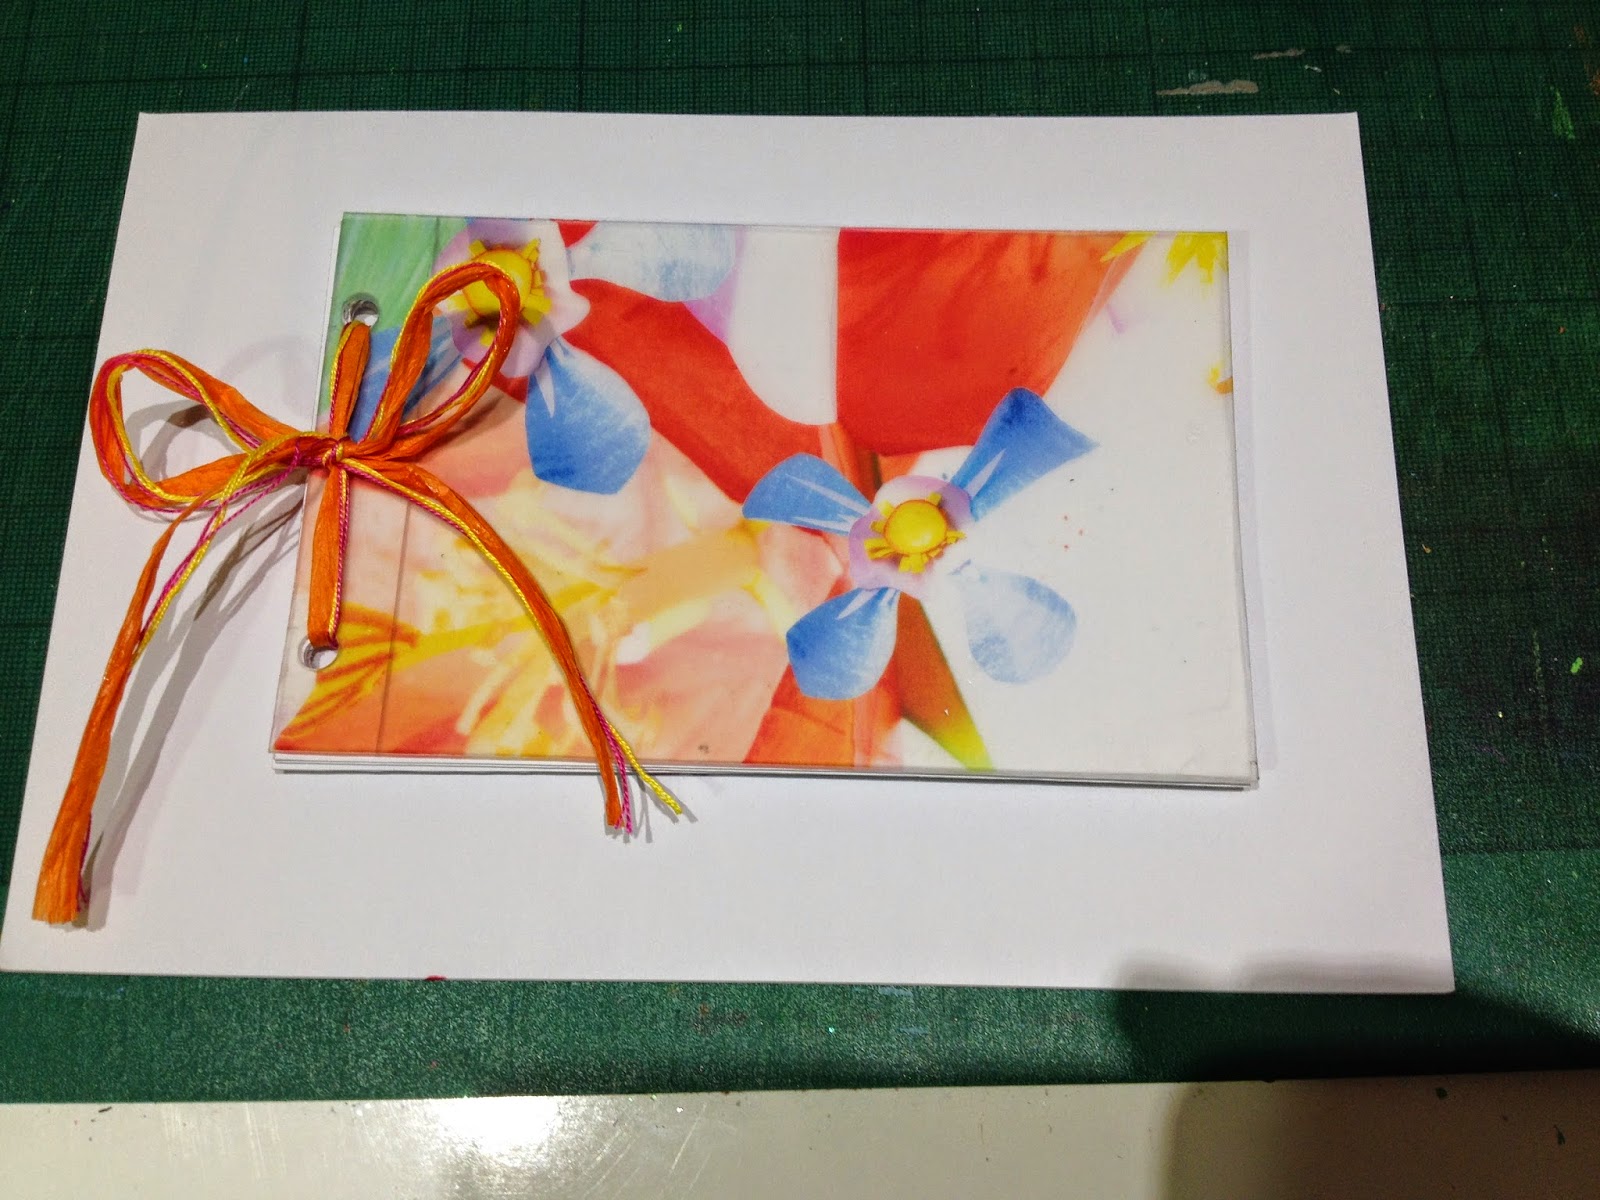
 Yarn to tie up the finished book. I think the print on the front looks quite dramatic- I'm pleased with the outcome.
 opening the book up:

 the back:

 Scoring and folding to create the cover spine
 gluing the pages with PVA to create the perfect bind
 attaching glue strips to the cover to create decorative foiling technique on the outside
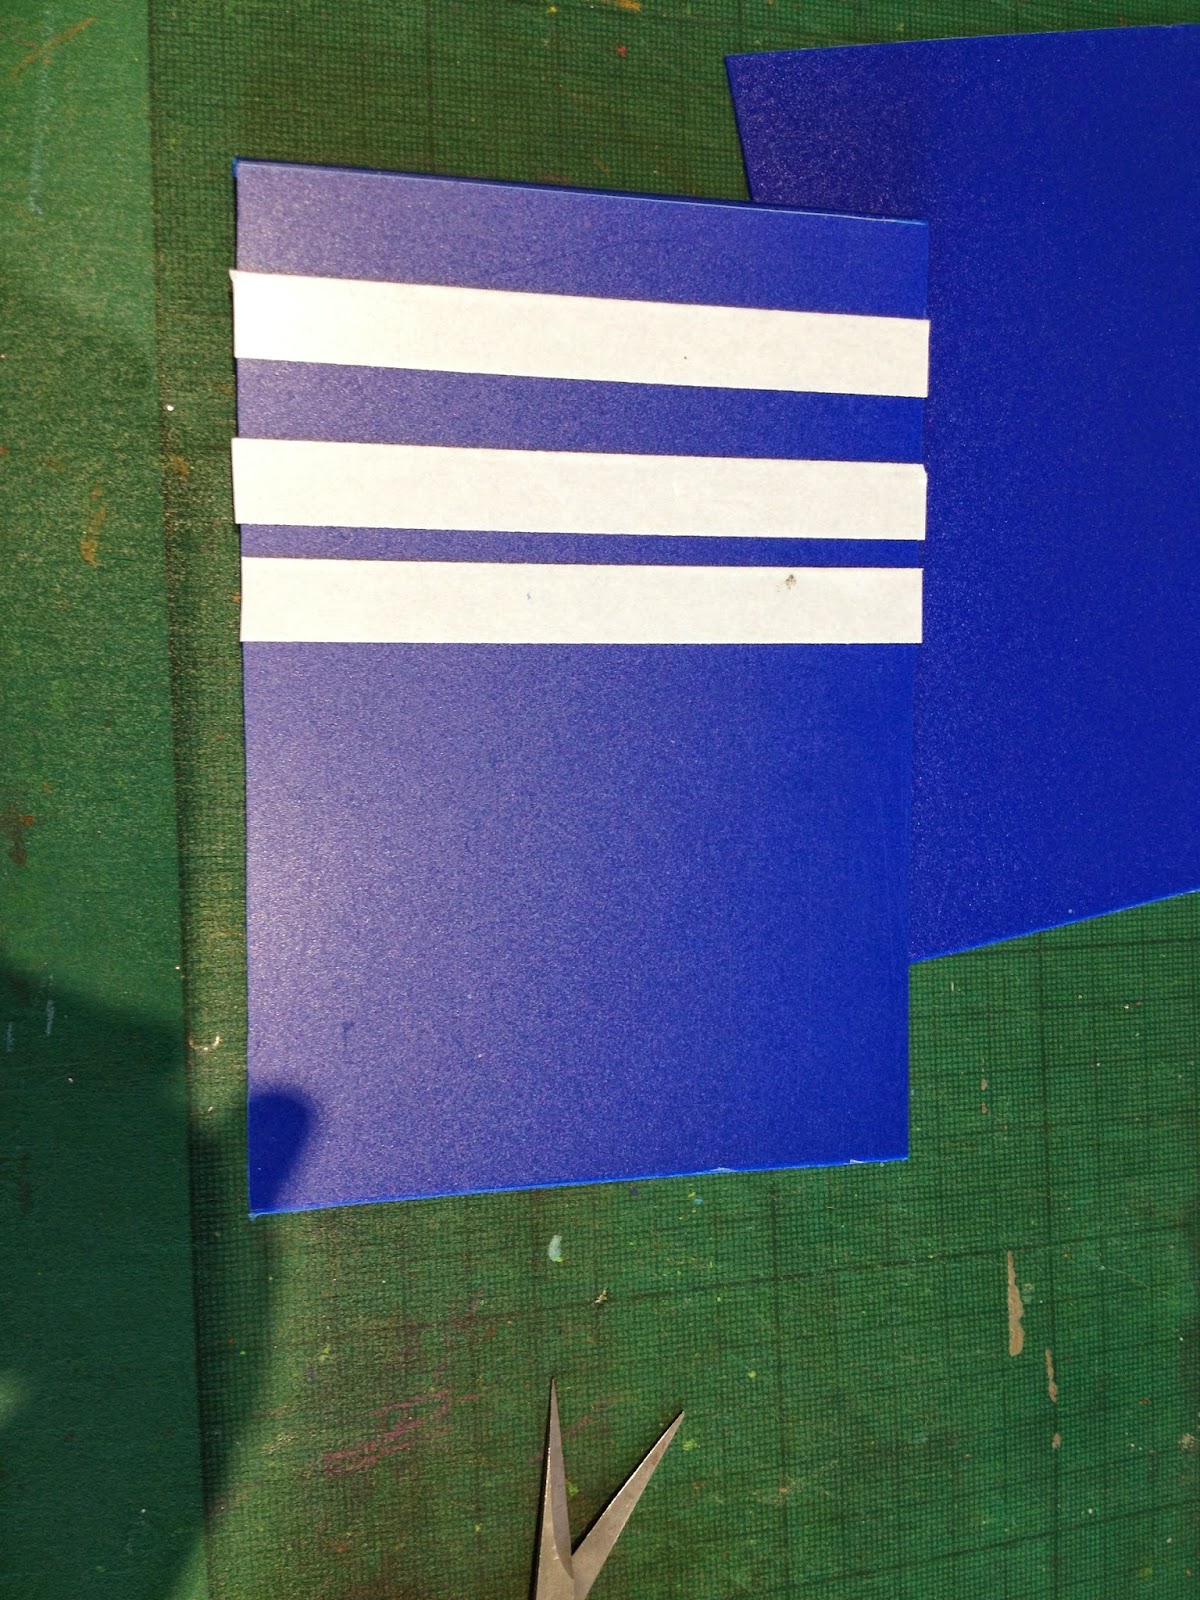 the foiled covers, all ready to put the book together now!
 ta-dah! hard back, perfect bind book :)


 the back-


my latest hand-made books!


Here's a few pictures of my process, and then the finished books themselves. I wanted the books to reflect my work, so I was playing around with hand making/personalising covers using techniques from my textile projects.
cutting pages to begin!
Book 2
This book is a perfect bind with a hard cover.
Cutting the covers-
my latest hand-made books!
return of the sketchbooks!
I decided to do a little more sketchbook research! Plus, I wanted to have a go at making a few more books- I gave the first ones I did away as presents to people! (I'll upload pictures of the new books I've made in a fresh post after this one)
These handmade books (the work of artist, Ashleigh Meusel) are beautiful- they are made using Japanese 'stab' binding. I think the name sounds a bit vicious, but the final appearance this technique gives the spine, is quite amazing.

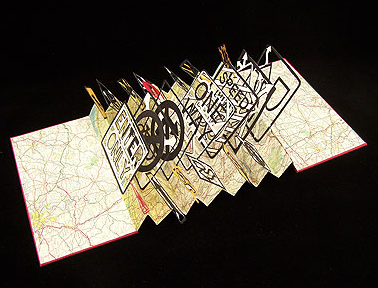
I have also developed a love of fancily folded books! After a bit of pinterest and blog searching, I came across star tunnel books, such as the one pictured here, made by Karen Kiick, who ran a 'book arts' course, focused on exploring different book-making techniques. I certainly want to try making something like this! It's a work of art in it's own right, as well as being a useable book. It's a bit like a fancier version of our simple french fold concertina books, made in the second session of this module...
This is also very exciting, from Karen Kiick's website- a popup book! These remind me of children's story books- you immediately feel like you want to interact with the work, because it moves beyond the flat surface of the page:
I like how these three-dimensional books have a heightened sense of narrative. In our opening sketch innovation session, we discussed how sketchbooks are a place where the story or journey of a project unfolds and can be looked back on. It would be interesting to create a 3D book like this for a project, and see how it influences the development of ideas- perhaps it would encourage more creative, playful, innovate thinking than simply a flat sketchbook does? ...It's an interesting idea for future projects in my textiles practice!
These handmade books (the work of artist, Ashleigh Meusel) are beautiful- they are made using Japanese 'stab' binding. I think the name sounds a bit vicious, but the final appearance this technique gives the spine, is quite amazing.
 |
| see more at the artist's website, here |
I have also developed a love of fancily folded books! After a bit of pinterest and blog searching, I came across star tunnel books, such as the one pictured here, made by Karen Kiick, who ran a 'book arts' course, focused on exploring different book-making techniques. I certainly want to try making something like this! It's a work of art in it's own right, as well as being a useable book. It's a bit like a fancier version of our simple french fold concertina books, made in the second session of this module...
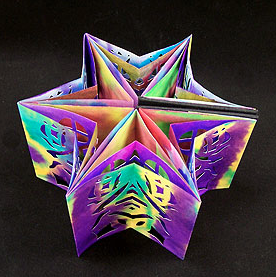 |
| Star tunnel book, Karen Kiik 2010 (image accessed here) |
I like how these three-dimensional books have a heightened sense of narrative. In our opening sketch innovation session, we discussed how sketchbooks are a place where the story or journey of a project unfolds and can be looked back on. It would be interesting to create a 3D book like this for a project, and see how it influences the development of ideas- perhaps it would encourage more creative, playful, innovate thinking than simply a flat sketchbook does? ...It's an interesting idea for future projects in my textiles practice!
Monday 22 December 2014
Pecha Kucha and other research
This week we presented ideas we've been researching related to sketch innovation so far, to share our thoughts as a group. Pete briefed us to present in a 'Pecha-Kucha' inspired style. I like the fact that this (mostly!) kept things quite concise and to the point, with little snippets of information and inspiration being raised through each person's series of images and corresponding explanations. I hadn't heard of this form of presentation before, so there we go- I've been learning new things all the time on this module! From the definition of a pamphlet book, through to what a Pecha Kucha presentation is- fantastic :)
Here is a view of the images I presented:
the first section was drawings/sketches that have been significant in my own work-
When I was looking back at my foundation work, I was interested to see that even then, I was instinctively selecting sketches from my early design development, and carrying them through to print design work. I realised that I enjoy working in this progressive way- combining hand drawings with digital technologies, by scanning things in and manipulating/layering them up in photoshop
Lina Peterson's approach to jewellery design really inspired me on my current textiles practice where I was creating my own jewellery collection, since I was also working with wood and plastics in a contemporary way. I found it really useful seeing her little development sketches, as it helped me think about the construction of my own pieces, and how ideas can translate from 2d to 3d in terms of textiles for accessory.
Our current project in textiles has been focused on colour, and I like how Mia Christopher uses her sketchbook pages as a place to play with and explore colour. While I was putting together my colour palettes for this project, and producing different colour combinations, I created a fair few pages in my own book that looked a little like this!
I included this image in my presentation, as 'the very hungry caterpillar' was one of my favourite childhood books, and I was always fascinated by the bright colours and textural qualities of the illustrations, created by Carle's painted collage style.
Innovative practice:
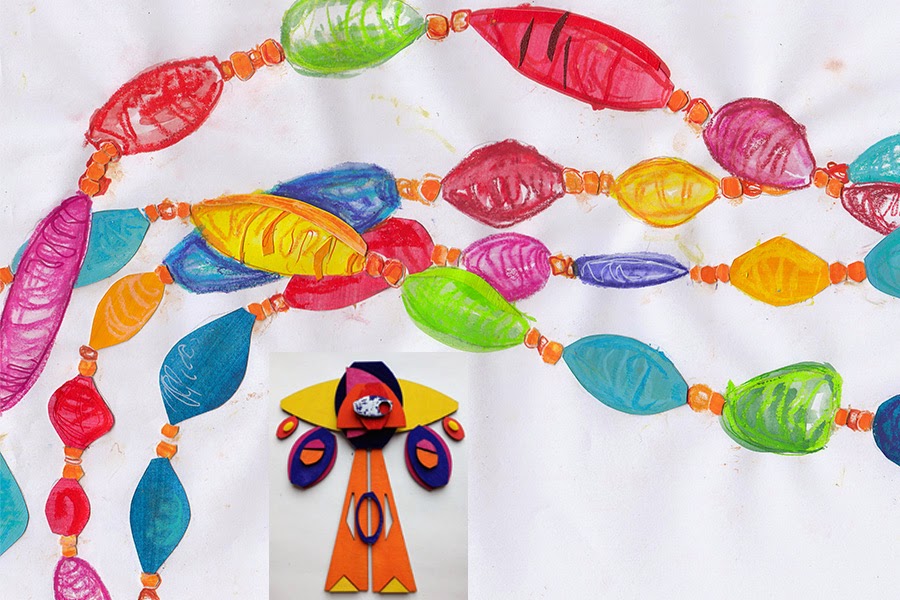
I really enjoyed this collaborative drawing we did together as about a group of 40 people in our textiles practise. We each were given a 1cm square section of a picture- none of us knew what the picture itself was, we just knew that each section was numbered, so when we'd all drawn our small piece out onto an A1 sheet, we could match them together to reveal the final image. This was a good experiment in terms of scale, as drawing out a 1cm square section onto an A1 sheet required some thinking and planning! And it also required trust- that somehow our section would work together in the picture as a whole, and fit in to what everyone else was drawing. (My piece is the lower part of the crown just above the left-hand eye, as the picture is facing us). I think large-scale collaborations with lots of people are a good way to innovate- as everyone's individual contributions mix together to produce a piece that contains within itself, many different stories and styles, meaning the outcome is both collective and individual at once. It would be interesting to try this task with lots of different groups of people, and then have a display of many different individual yet collaborative pieces.
I really like how Braun creates environments out of her work- often covering gallery walls or exhibition spaces, it's like a fingerpainted backdrop or scenery. Her work is very expressive, and in contrast to our task of making a 'drawing device', where marks were made autonomously by an object or process (as also with Eatock's pen pictures), Braun's work is all about the body and movement- marks go as far as her arms can stretch, and boundaries are set by the shape of her fingers. She works a lot around pattern and symmetry, using both hands at once to create a mirrored effect.
Here is a view of the images I presented:
the first section was drawings/sketches that have been significant in my own work-
 |
| brio play, pencil and ink (2013), and digital prints (own images) |
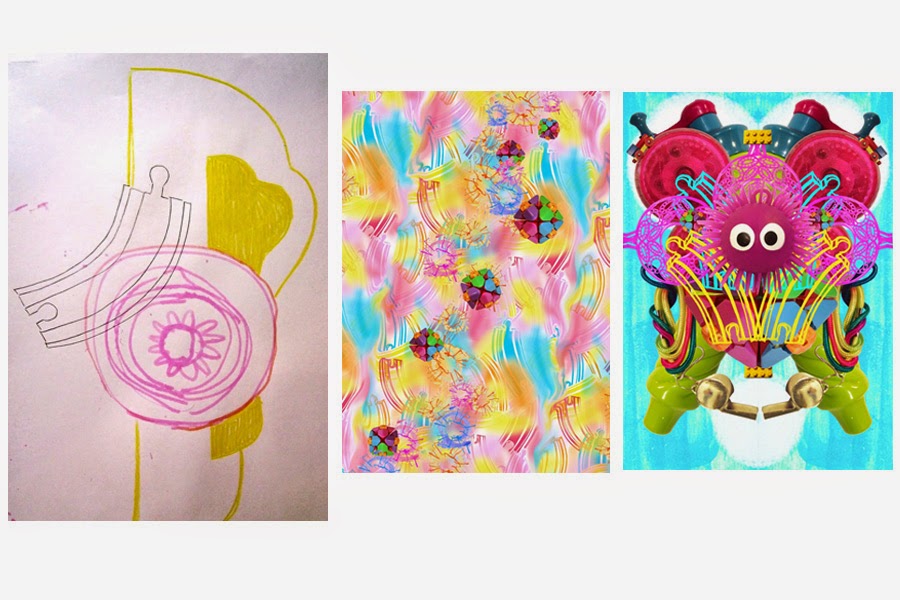
The drawing on the left was made during my first year- it was a progressive drawing from a selection of objects I had infront of me. I began by drawing the brio train track piece in pencil, and then told myself I'd use a different media to add in each extra element, to build up a collage style drawing that could give inspiration for a print design. The 2 digital prints next to this image, are the outcomes that followed- my playful initial sketch, led me to playful, collage effect patterns, that used re-drawn, scanned in versions of the 'brio' motif as a start point. I had no idea at the time, that my initial quick sketch would shape my outcomes for that technical block unit. It just shows- the influence of one drawing can go far!
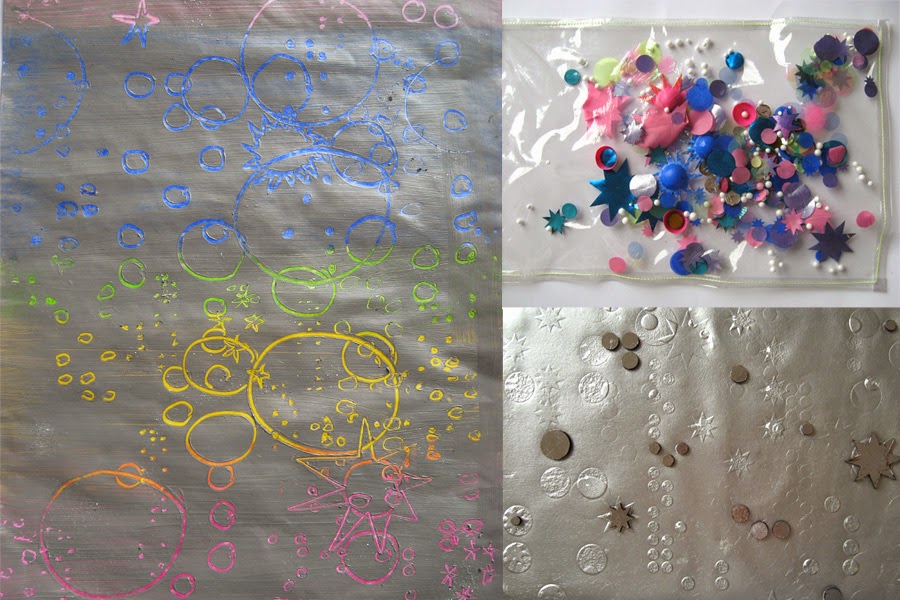 |
| acrylic paint over oil pastel base, scratched into (2014), and fabric samples incorporating trapping, laser cutting, embossing, foiling and heat pressing. (own images) |
The left shows a drawing made exploring the idea of braille (writing for those who are blind) in colour, playing around with braille cell coding that reads 'touch me', to create pattern. Following this, I began sampling fabrics that would have sensory qualities, with sections of braille and raised surfaces embossed into them, to create coded patterns. Braille is such a beautiful language, and I wanted to explore the idea of tactility, and surfaces that would invite touch. But also, from my original drawing, I was thinking about how braille is colourless- so I added colour and shine and different textures into my work, to increase the sensory appeal, regardless of whether people are sighted or not.
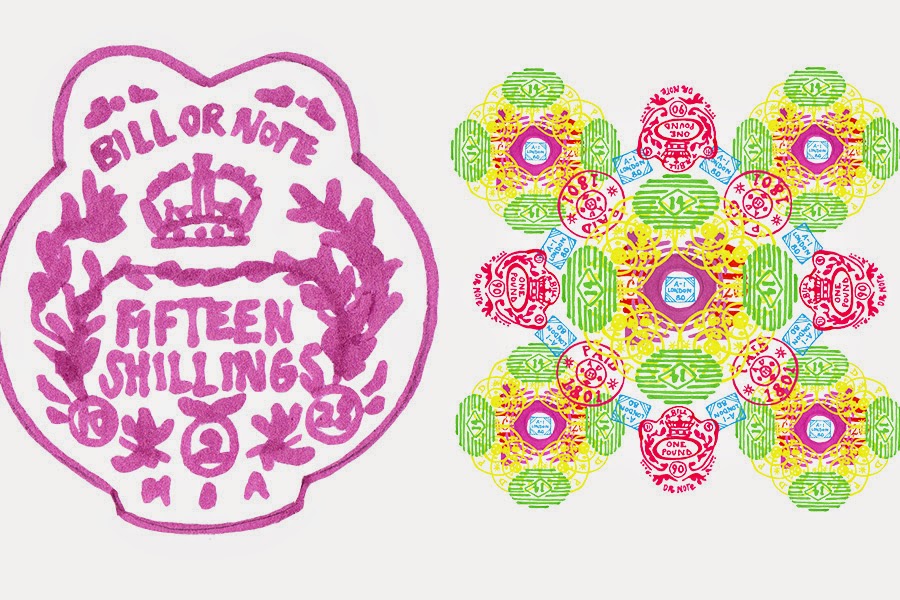 |
| pro marker sketch of postal stamp (2012) that lead to photoshop print (own images) |
 |
| paperbead collage from current project, using paint, paper, pencil and wax resist (2014) |
This is from my most recent project, which I have been working on alongside this module. And infact, the emphasis on exploring sketch in this module made this drawing very significant indeed. Because as I was creating this collage, based on my research of paper beads made in Tanzanian culture (Tanzania was my research focus), it lead me to explore the shapes of the beads, and create my own jewellery designs as an outcome (one of my pieces in development is pictured in the centre of this image)
Drawings that have influenced me:
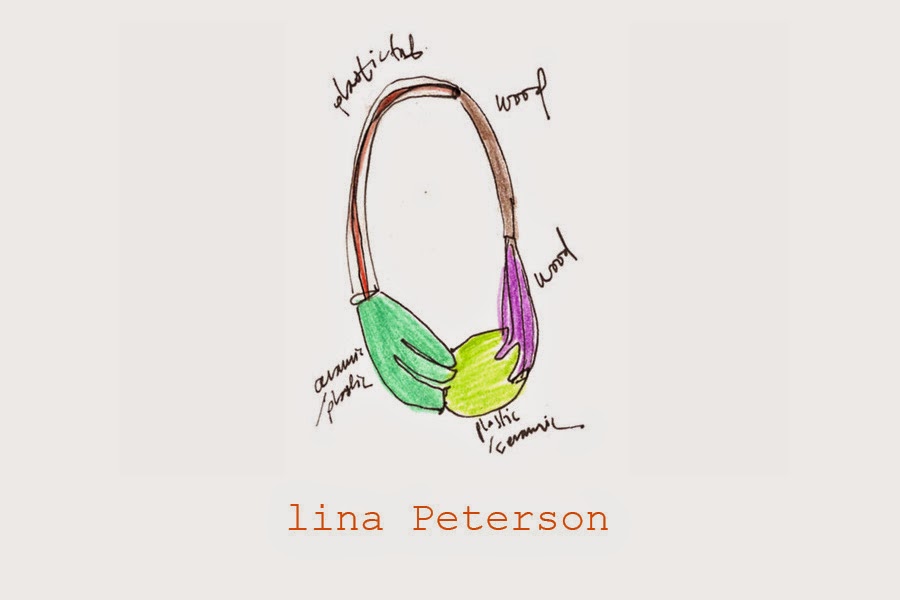 |
| Lina Peterson jewellery design sketch, images available here |
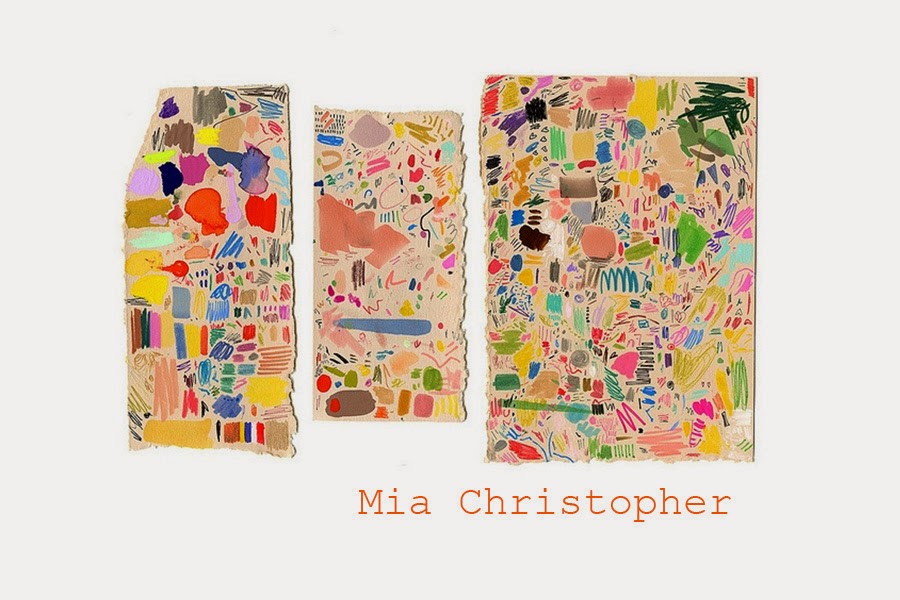 |
| Mia Christopher, colour tests, more sketchbook pages can be seen here |
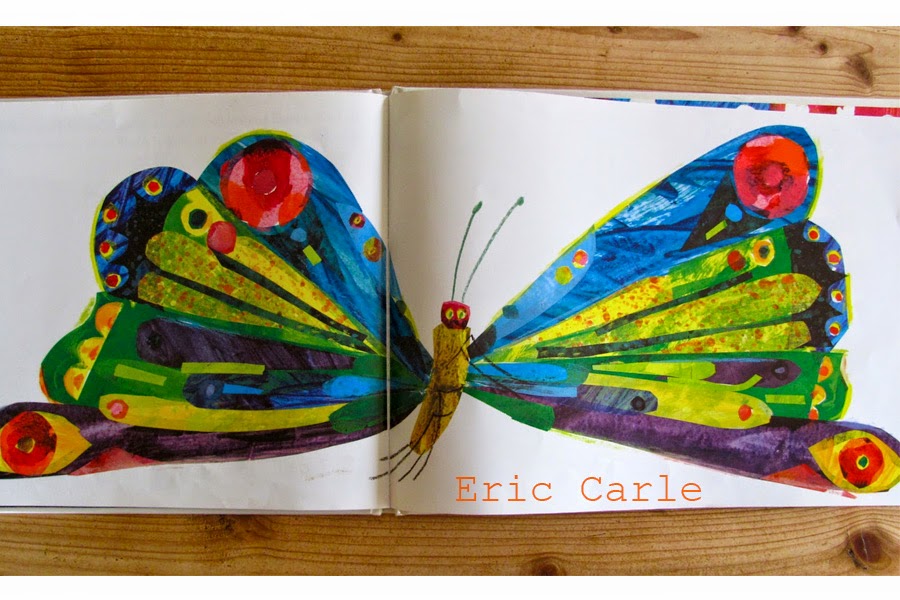 |
| Eric Carle, 'The Very Hungry Caterpillar', collage style- illustration |
Innovative practice:
 |
| Daniel Etock, pro markers bleeding onto white paper (2011), see more here |
When I was looking at playful methods of drawing last year to inspire my 'things to play with' project in Textiles, I researched into Daniel Etock's work, and it came back to mind when I was thinking about this presentation. I love that the final piece is organic- there is no guarantee exactly how the pens will bleed into the paper, so the resulting pattern is not calculated or controlled- it involves an element of surprise! I also like how Etock left the pens for differing amounts of time to see how this would effect the marks that are made. It would be interesting to take this idea into fabric, and perhaps the dyeing process- applying a technique to samples of fabric, but each time carrying out the process for a slightly longer amount of time, and seeing what is left on the surface in terms of texture and pattern with each sample. Even repeating this pen experiment onto fabric could be interesting, as different fibres might soak up the ink to different intensities and it might spread in different ways across the fibres...so much potential for future experimentation!
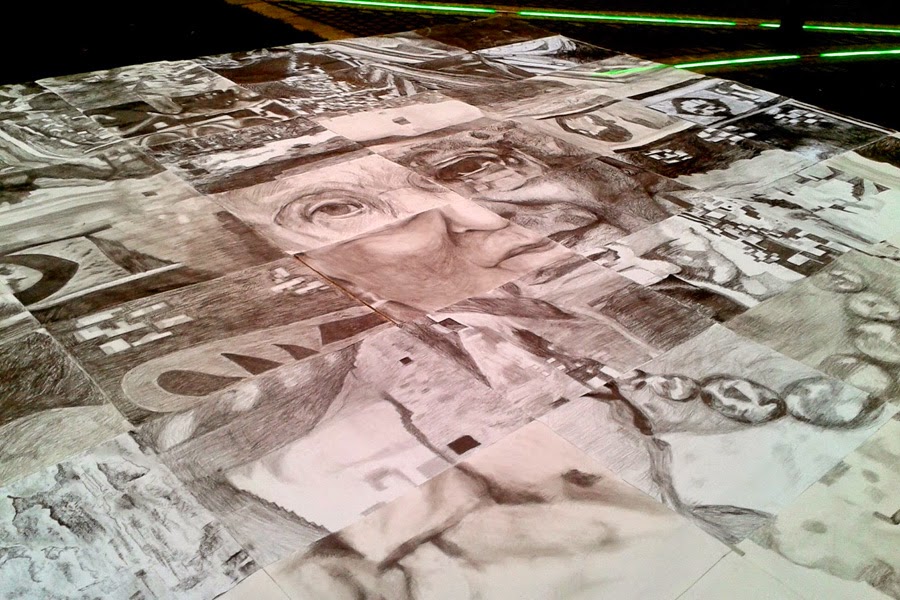 |
| BA Textiles collaborative drawing of the Queen (2013), pencil onto pieces of A1 cartridge paper (own photo) |
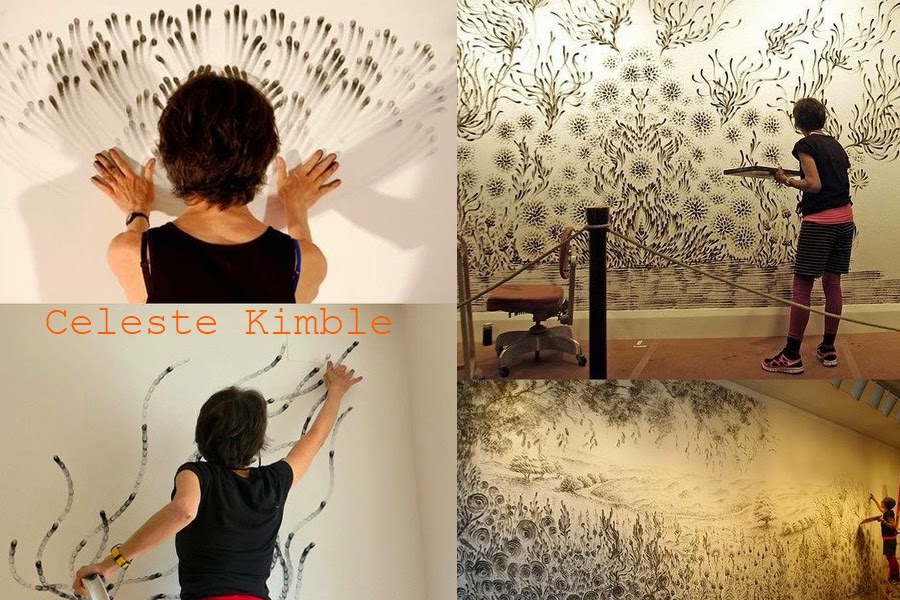 |
| Judith Ann Braun, 'fingerpainted' charcoal drawings (see more here) |
So, that's my little presentation write up! When we shared our findings in the group, it was interesting to see the mix of things that we classed as 'innovative', incorporating both hand and machine created outcomes. It would be interesting to cross these two areas, perhaps. I liked the video Pete showed us of a large scale 3D printing machine, that is able to print 'paths' of line into empty space from the floor or wall (reference video here). Printed drawn 'paths' like this, could then be hand-drawn ontop of by people, to decorate the surface of the 3D line- a way of 'drawing' onto a 3D drawing, and combining machine and human sketching into the same piece...
In this video I found, 3D printing has been used to seamlessly slot into the real world- in this example, it is a continuation of a wall, to make it look as though it has been constructed from Lego bricks. I like the idea of being able to use 3D printing as a way of 'drawing' into reality, to play with appearance, context and meaning, by adding to everyday sights with bits of printing, that at a glance, appear to be real. On a recent trip to the science museum, I saw many other 3D printed objects, and I think it opens up fascinating possibilities to extend the idea of 'sketching', quite literally, off the page.
Through technology, 'sketches' can actually become three-dimensional sculptural forms, in real time.
In terms of Textiles, this also reminds me of something I blogged about last year- Fabrican spray on fabric (see my original post here!).
I think this is a type of drawing, too- the ability to 'draw' your own clothes directly onto the body. Also, in turn, this process creates a kind of drawing/record of your own unique body shape, as the sprayed-fabric can be taken off, hung up, or re-worn after it has been made, and it retains it's original sprayed form.
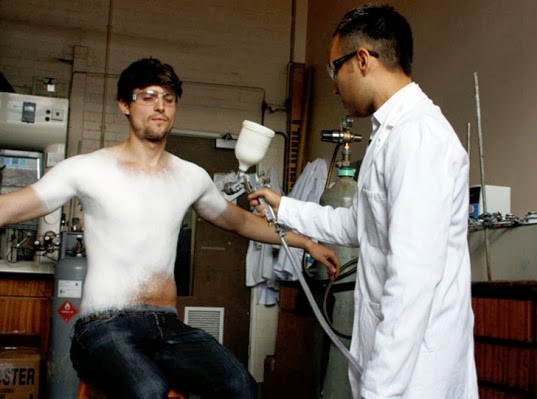 |
| spray on fabric t-shirt (image accessed here) |
Although technology is arguably taking us increasingly away from paper as a society, it does not mean that these new possibilities are the end of 'drawing'...infact, perhaps all these things merely are a form of sketch innovation, where technology is becoming the drawing implement of choice!
project- feed in!
Since this unit is focused on sketch, I've been considering the importance of my design-development drawings more in my textiles practise. As part of our assessment this term, I produced a look book telling the story of my jewellery pieces (which were my final outcome for the project). Initially I just included my colour palettes and research photos in the look book, to show influence of where my ideas had stemmed from. However, while I was putting the file together on indesign, I was thinking about our sketch sessions, and how drawing is actually a very key part of the design journey- it helps communicate how I worked out how to assemble and construct my pieces...so, I scanned in some of my sketches relating to my project development, and in-dispersed them through certain parts of my lookbook. When we had our exhibition, lots of people commented to me that the look book worked really well, and that seeing the 'behind-the-scenes' parts of my project, such as the sketches and photos of the making process, really added to people's understanding and appreciation of my final pieces.
I wouldn't have thought to have given prevalence to my sketches and design process in my look book if it hadn't been for the influence of this module- so thank you Sketch Innovation Fridays!
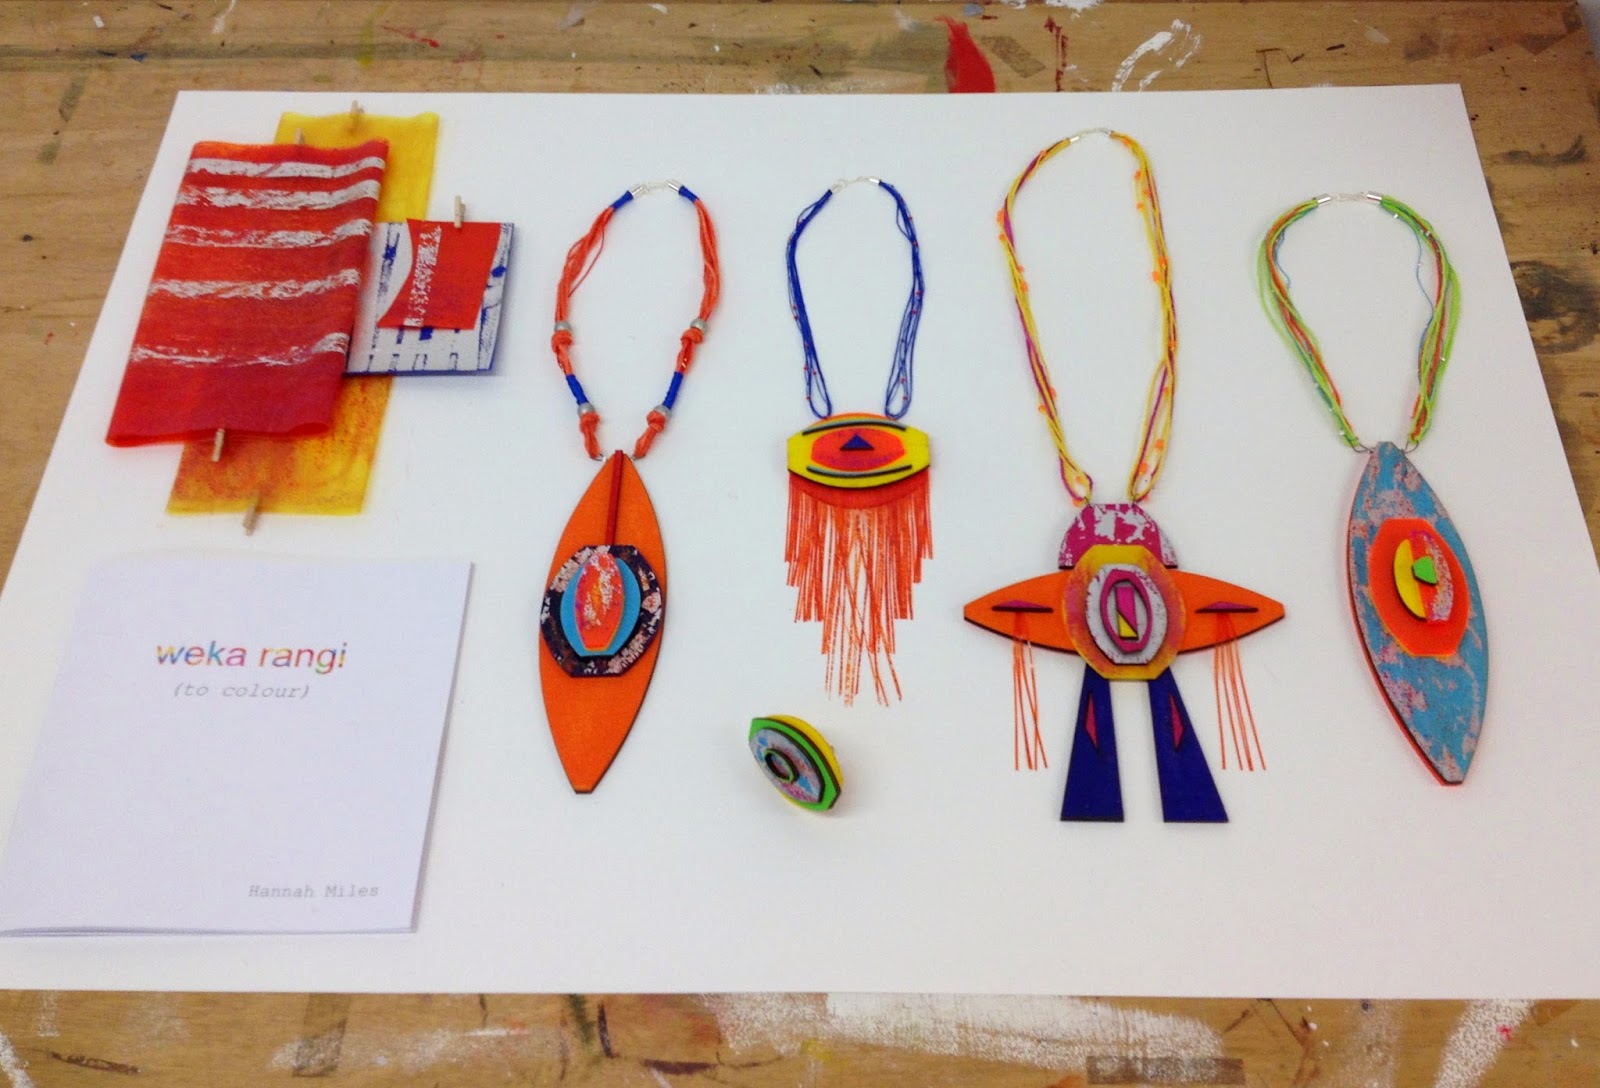 |
| My jewellery pieces, selected samples and look book in the BA Textiles 'colour exhibition' |
 |
| view of inside look book- with photo of sketches/development making included on right hand page |
drawing-device 'drawn' drawings
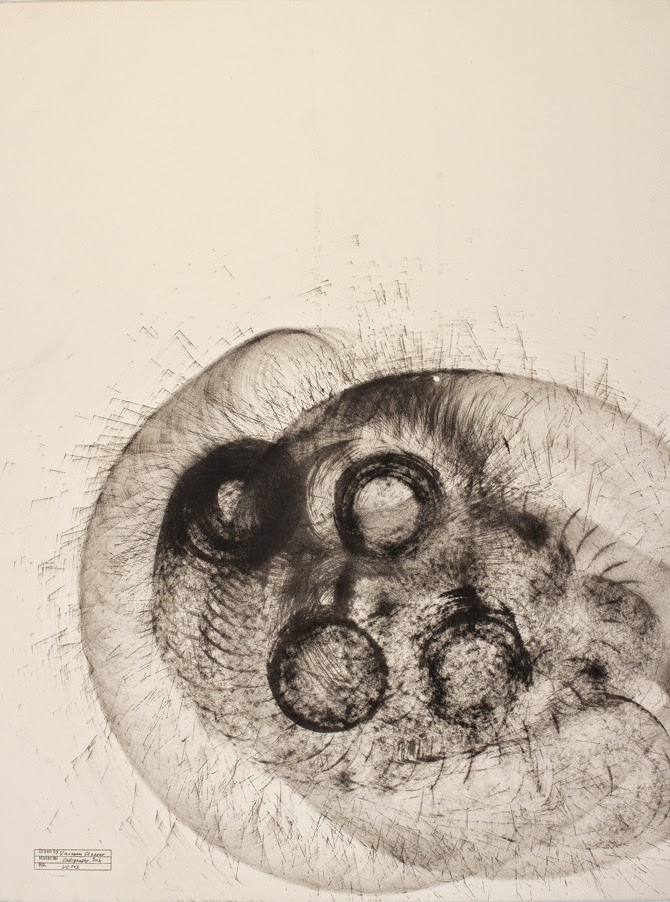
To follow on from my video of the device in use and the results it produced, here are a few still images of the outcomes, too.
So there we go- now you have the full span of my experiments and reflections! Echoing my thoughts from the previous post, I think the concept of this device could be developed to enhance people's self-awareness of their own drawing style. Having a record of how you draw, which is creating during the very act of you drawing, helps you see how the marks you make influence the drawings you produce. And the act of simply wearing the device and knowing that it is producing a drawing of your drawing, is quite a fun thing in itself. Perhaps it could be used to encourage people who are scared of drawing or being experimental, incase of doing things wrong, to loosen up their drawing style- the loose marks made by the device might help people to see that drawings are valid without needing to be exact or perfectly representational- they can be expressive and free.
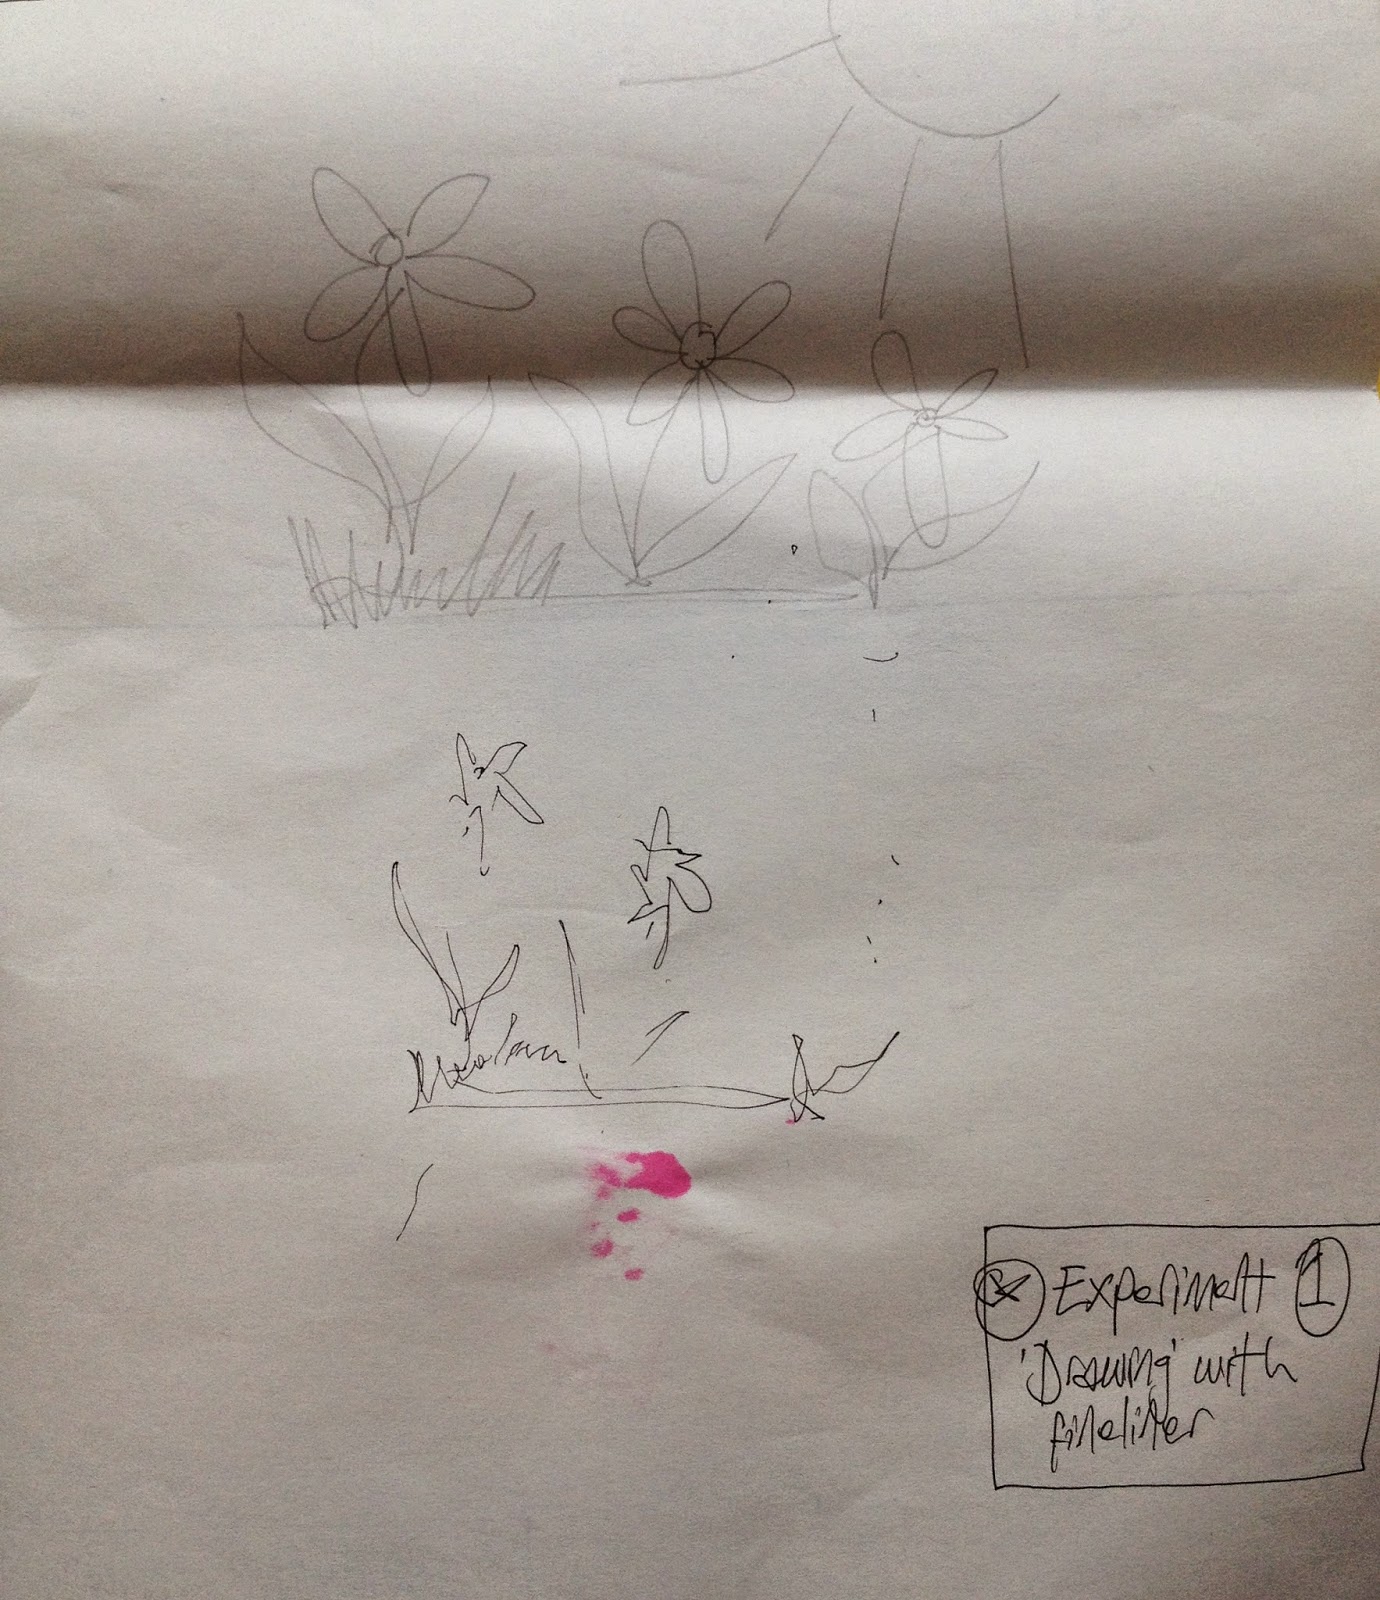 |
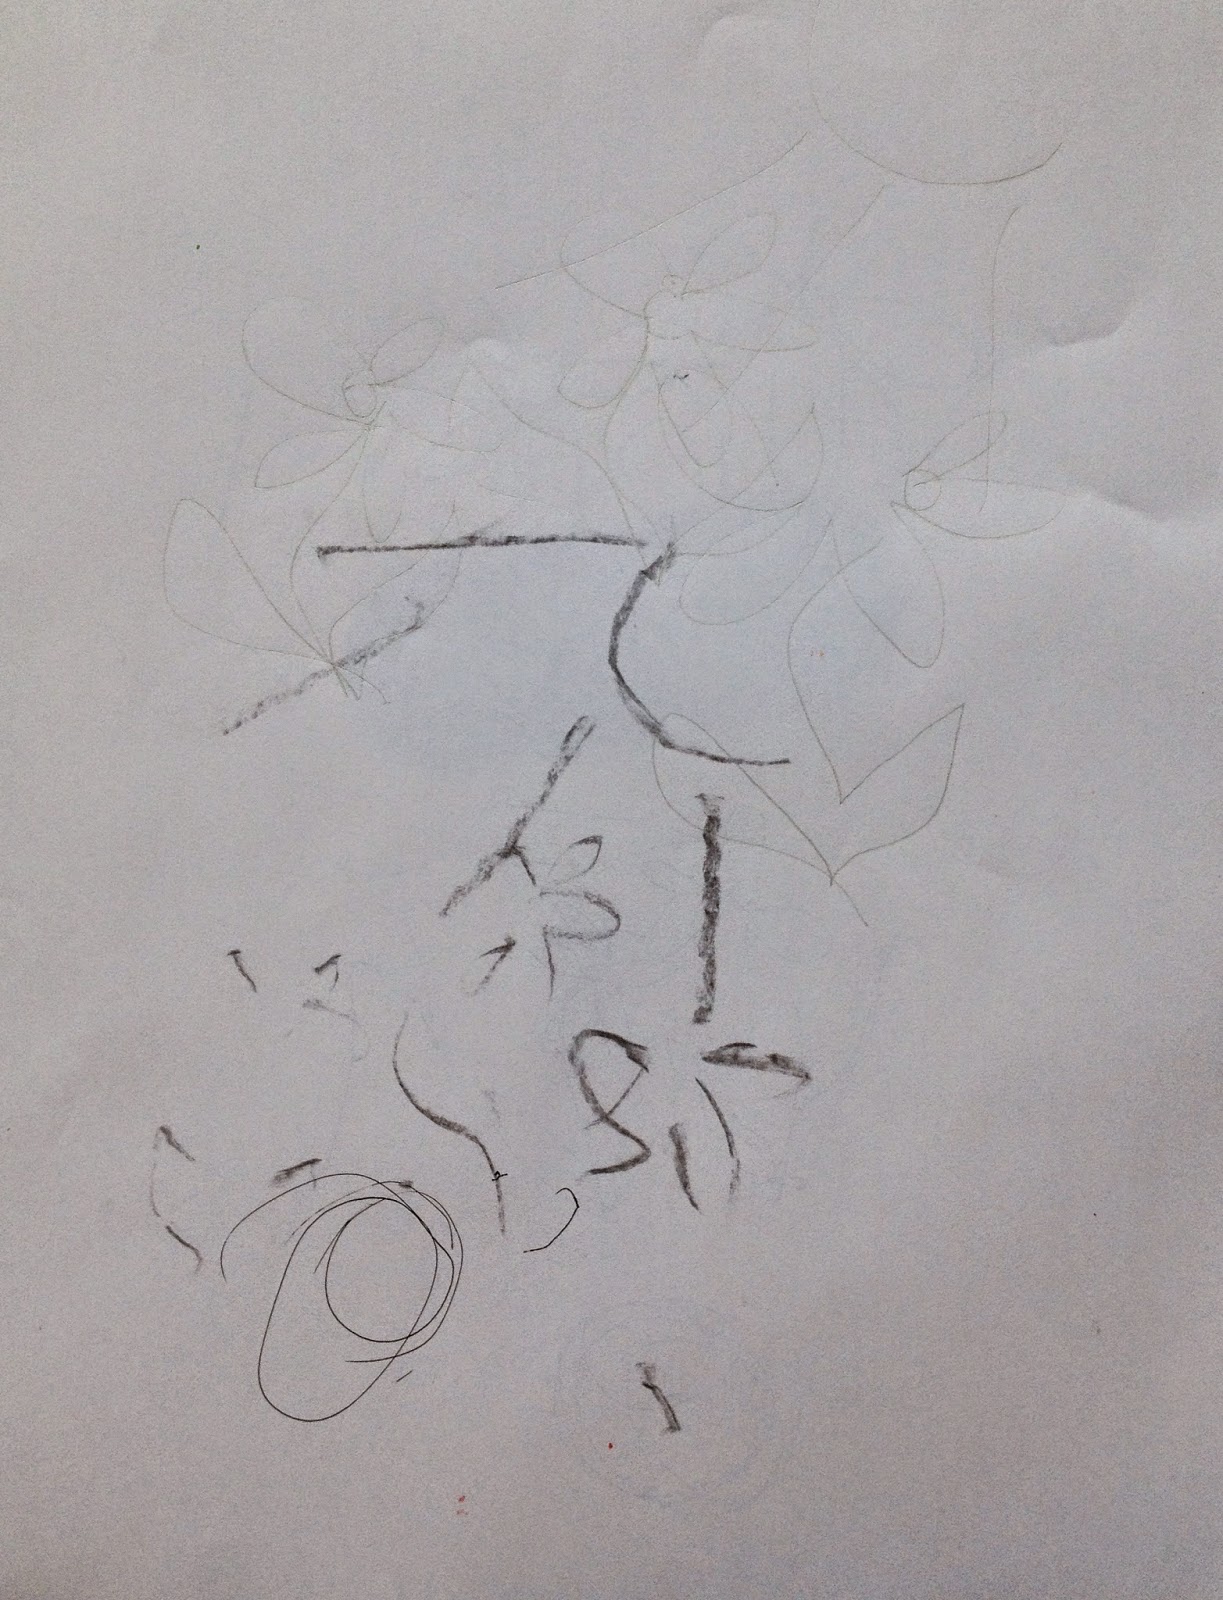
| It was really interesting with this first experiment to notice how the marks I was intentionally making to draw the flowers, were being translated in the drawing below. The fast pace I drew the petals at resulted in jagged marks made by the device, and the angle I tilt my hand at to draw the stems, didn't leave a mark with the device at all. |
 |
| After seeing the results of the device above with the clear, precise medium of fine liner, I decided to see what would happen if I used the more unpredictable, less controlled medium of ink- dipped in a brush I constructed from small craft straws. I made a very similar drawing to the first experiment, but the change in media has given it a very different translation by my device. Thinking of the outcomes like a 'language' or 'translation' of the original drawing, using a different media like this, is almost like changing into a different 'dialect' of the same image between the first and second experiment! |
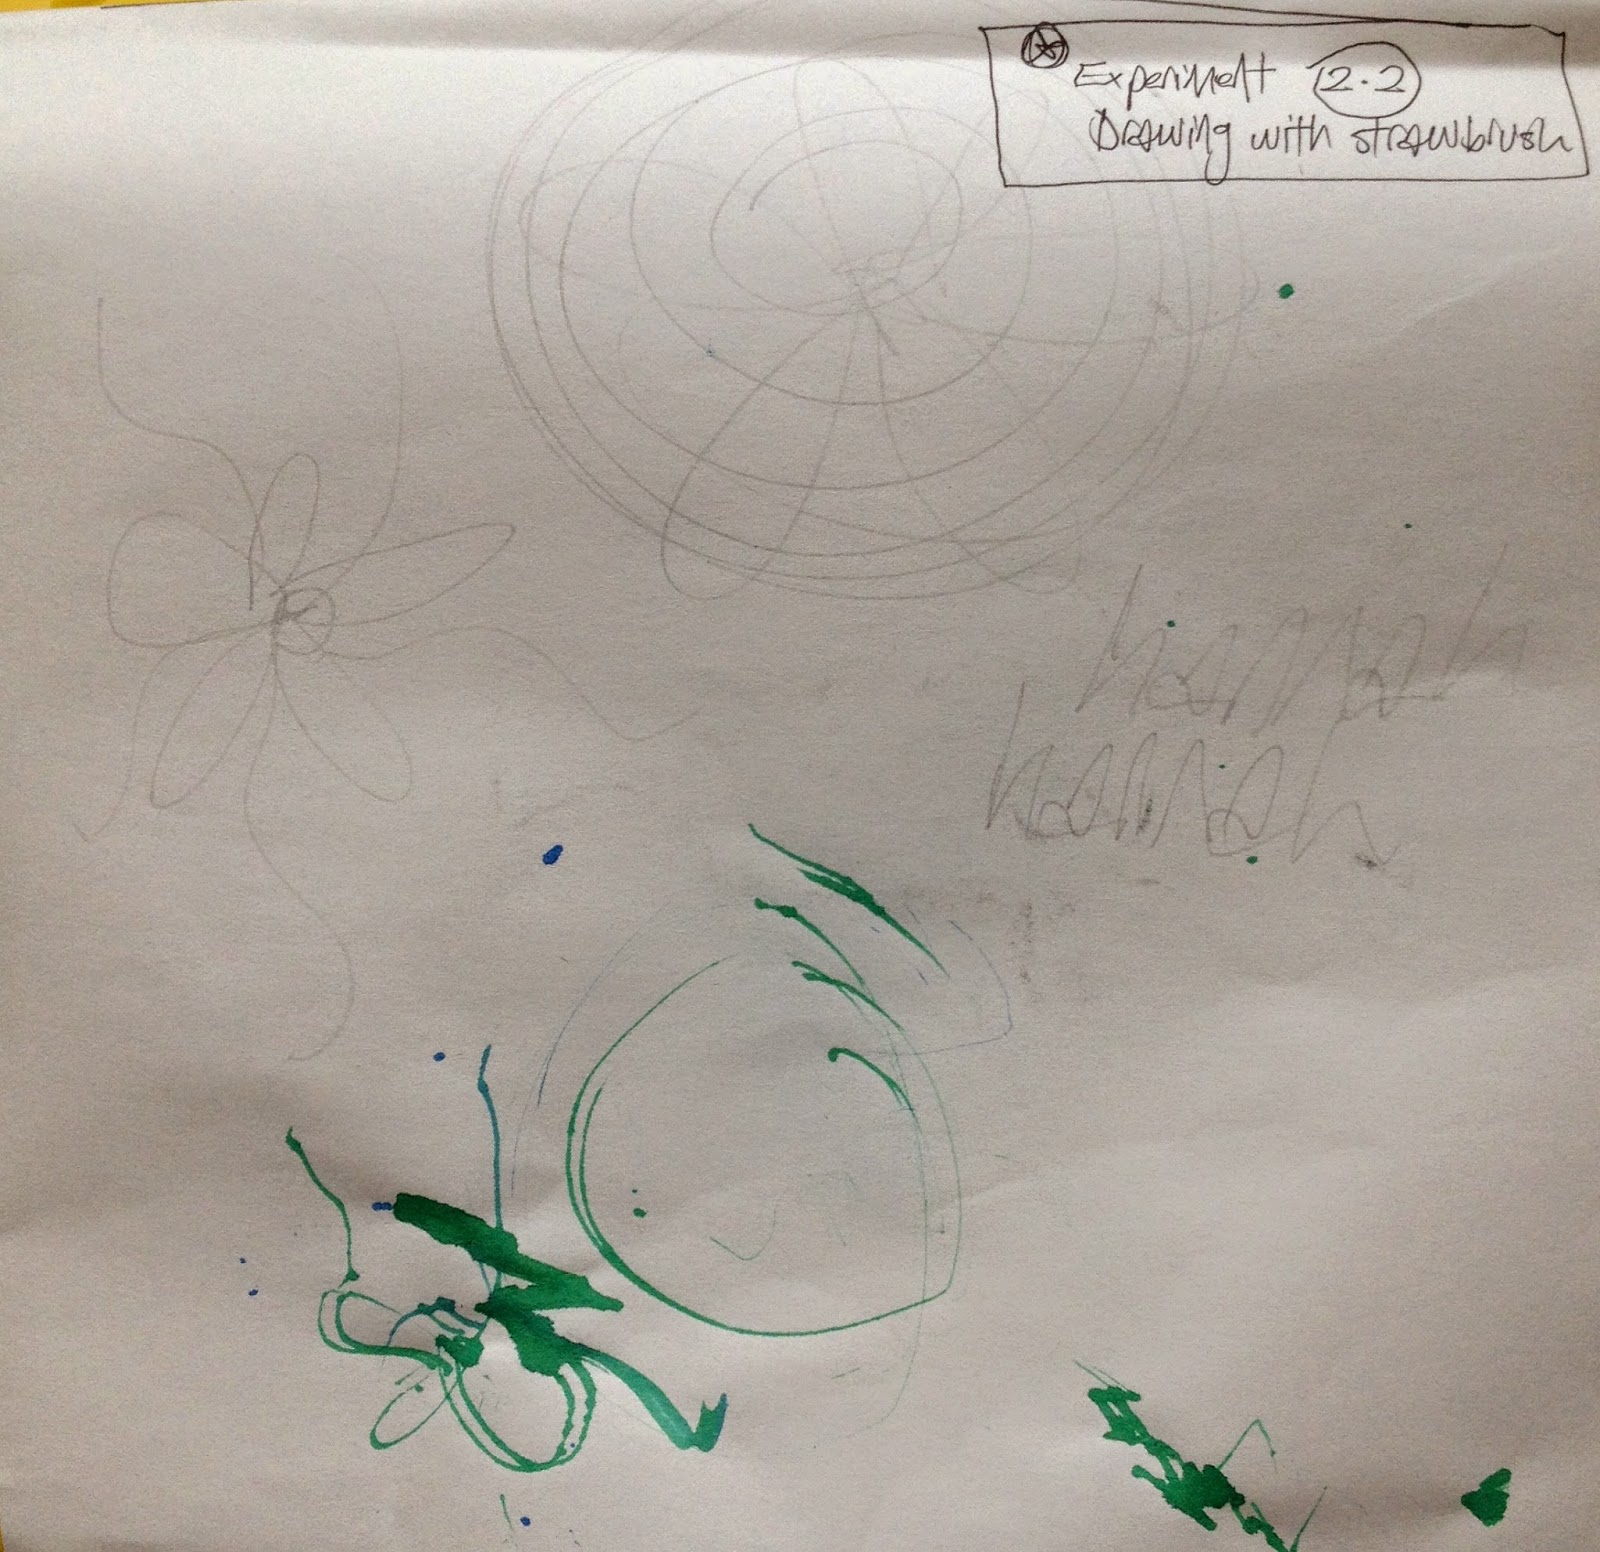 |
| Second straw brush experiment |
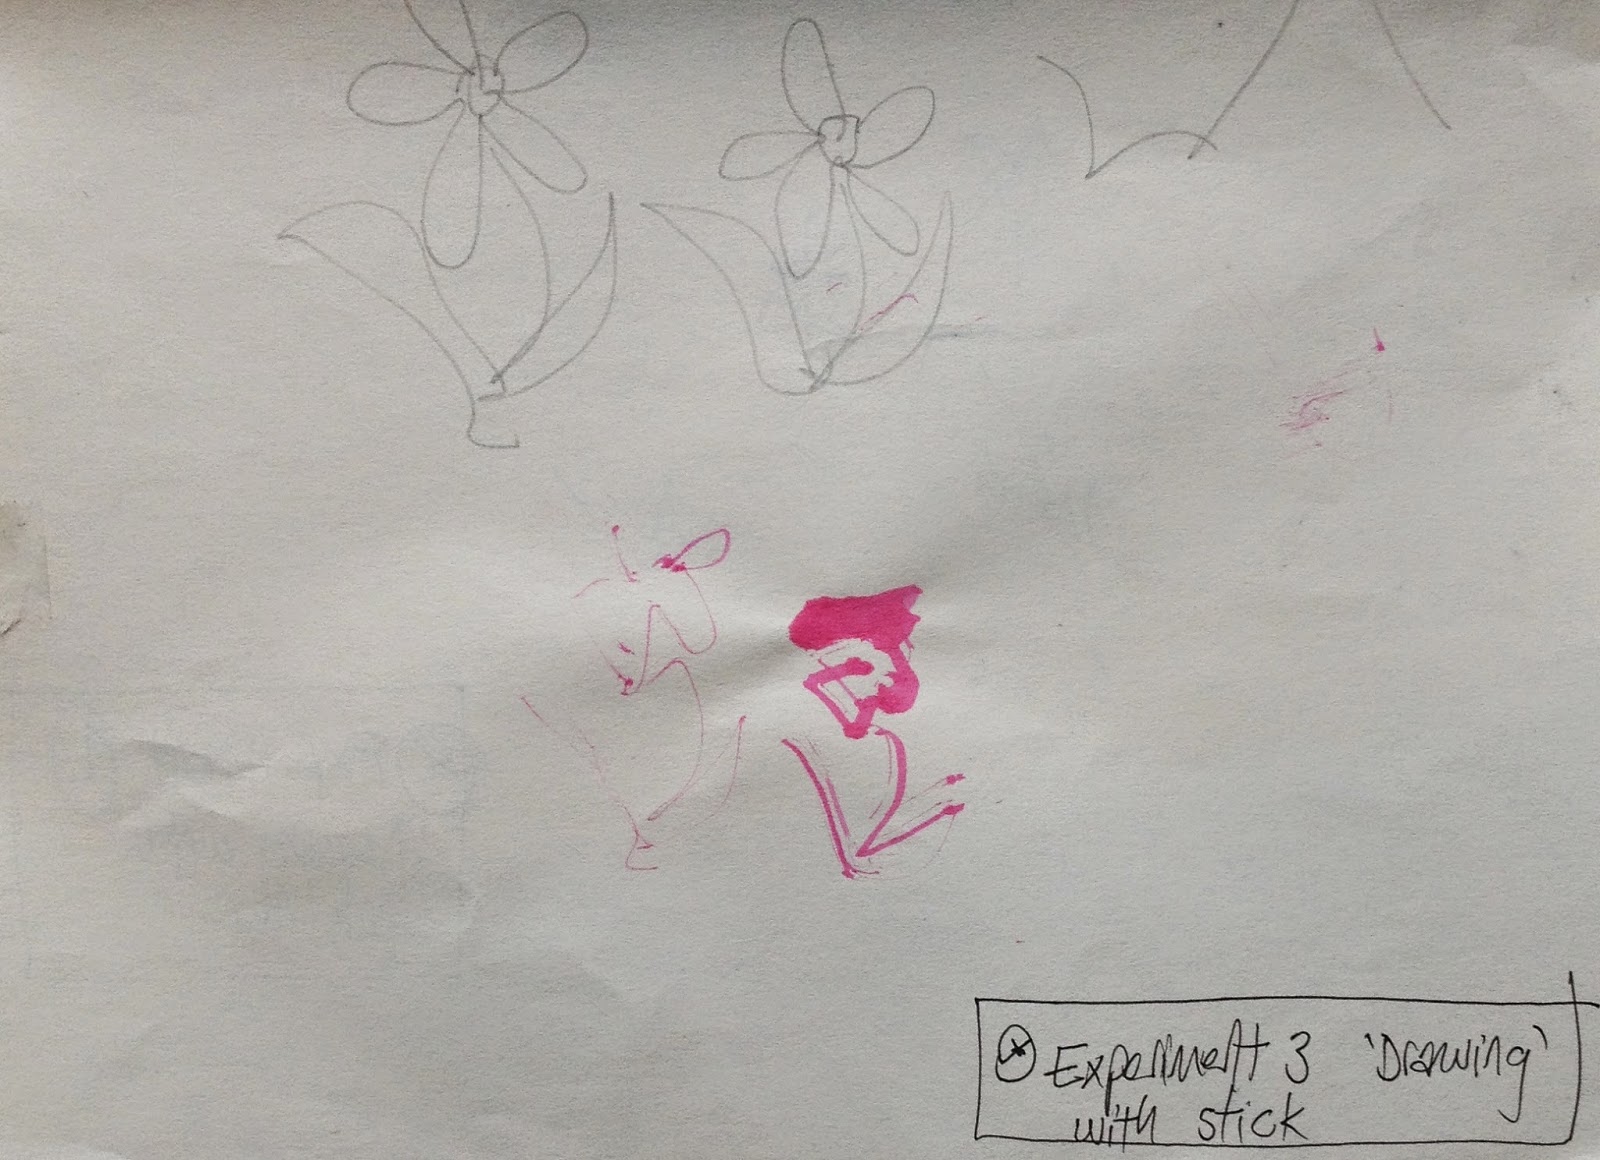 |
| Stick experiment. I like the contrast between the thick starting line, where the device was well inked up, in comparison to the much finer lines that follow, where the ink was running out. |
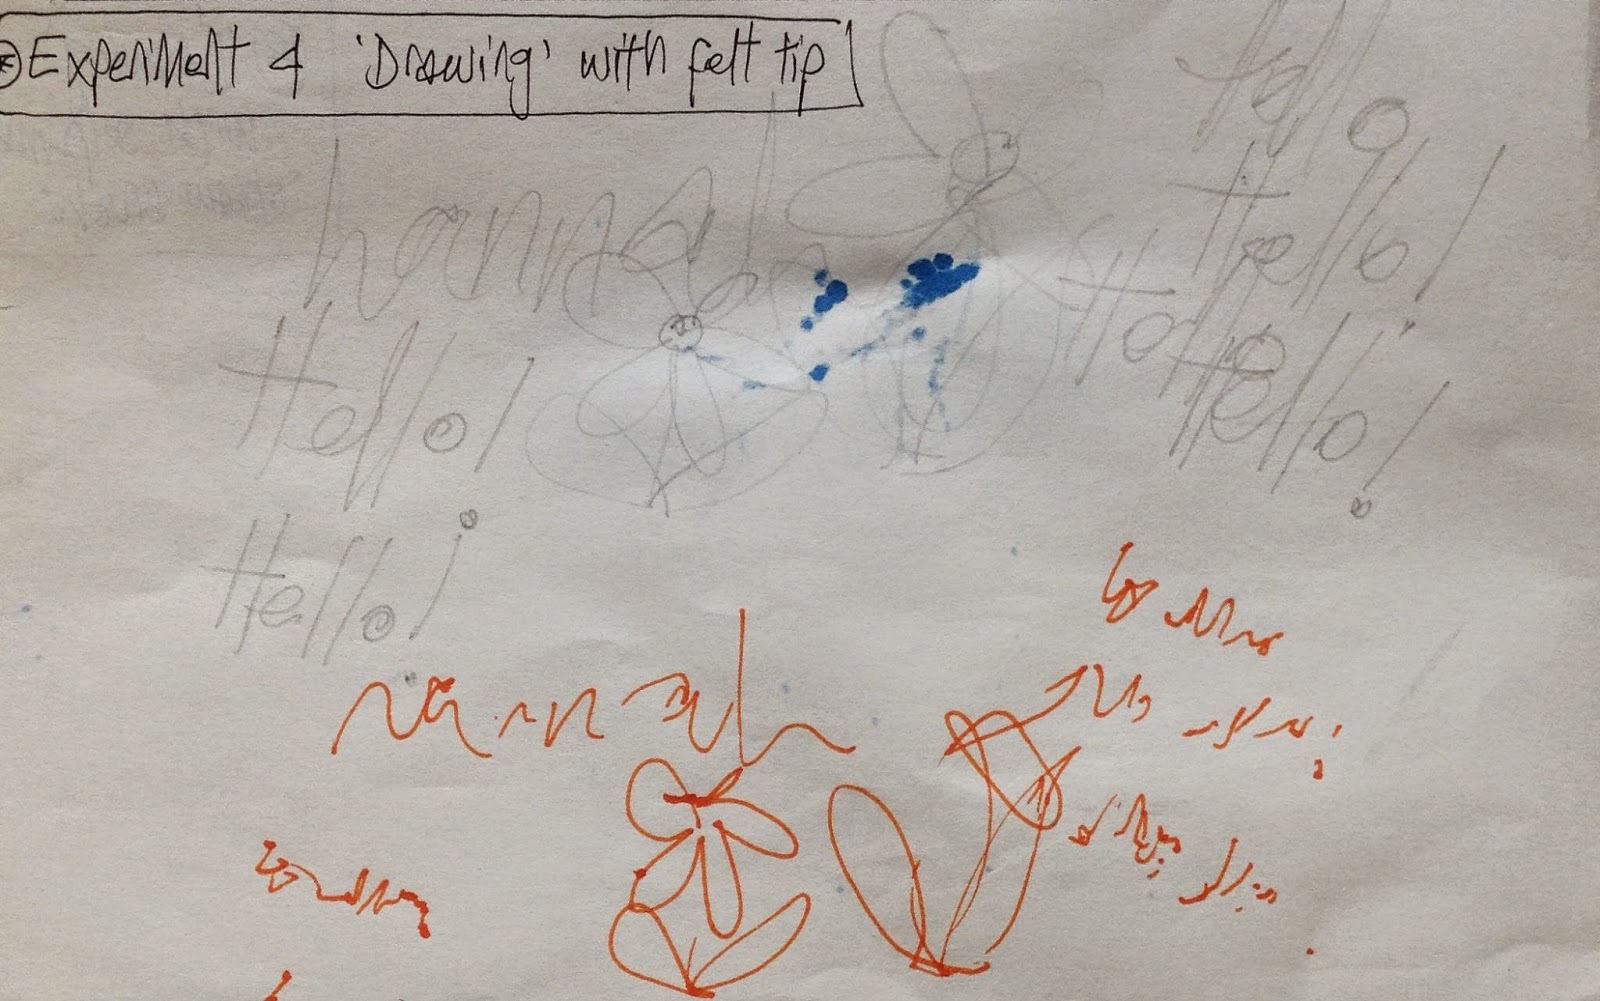 |
| The device's translation of written words is really interesting. This could make a good start point for alternative coding or secret notes to self...it reminds me a little of Leonardo Da Vinci's backwards writing to keep the ideas in his sketchbook secret. |
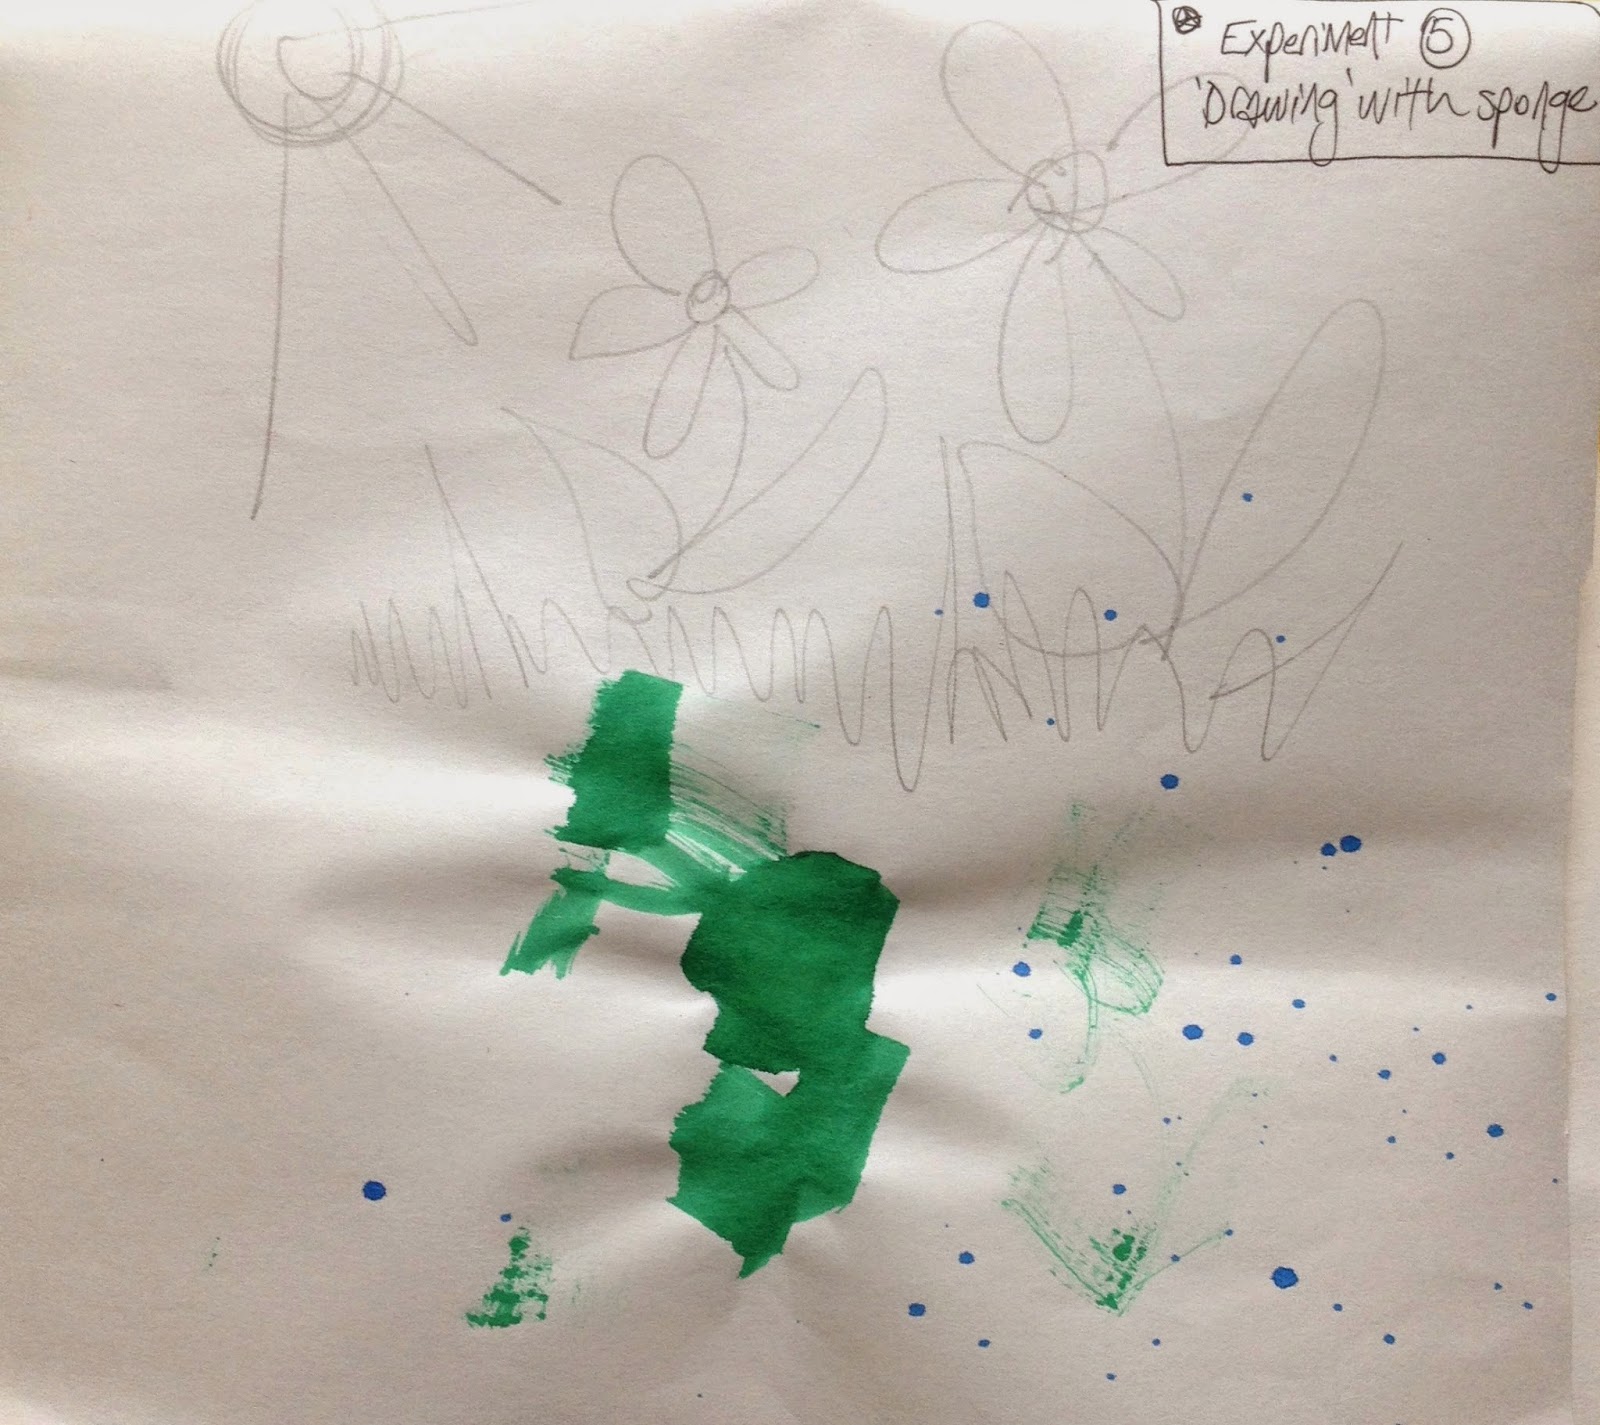 |
| sponge drawing. I really like the faint marks made to the right hand side of the initial green blob- they have a soft quality. Out of all the media I attached to the device, using a sponge was the most noticeable while you drew- it made me focus on the marks I was making, because I could feel it's connection to the paper from my wrist. (as well as obviously the pencil I was also drawing with!) |
 |
| final testing, playing around- using a subtle silver gel pen in drawing hand, with charcoal stick attached to device-- the contrast in media makes the device's marks are more obvious and prominent, placing focus on the device-drawn marks, rather than the intentionally hand-drawn ones made in gel pen. |
So there we go- now you have the full span of my experiments and reflections! Echoing my thoughts from the previous post, I think the concept of this device could be developed to enhance people's self-awareness of their own drawing style. Having a record of how you draw, which is creating during the very act of you drawing, helps you see how the marks you make influence the drawings you produce. And the act of simply wearing the device and knowing that it is producing a drawing of your drawing, is quite a fun thing in itself. Perhaps it could be used to encourage people who are scared of drawing or being experimental, incase of doing things wrong, to loosen up their drawing style- the loose marks made by the device might help people to see that drawings are valid without needing to be exact or perfectly representational- they can be expressive and free.
Friday 28 November 2014
my drawing device
The phrase 'drawing drawing' really stuck with me from Stephen Farthing's original lecture a few weeks back. So, thinking about this idea of 'drawing' a drawing, for this weeks 'drawing machine' task, I decided to try and make a device that records the act of a person drawing! Here are my results in video form. I tested several different media with my device, which ended up being a simple structure that strapped on around the wrist using a length of elastic and a clothes peg to hold the drawing media in place. I think it's an interesting way to capture the movements that a person makes while sketching, and it is almost like a translation of the drawing that is intentionally being made-- all the marks created by the 'device' are essentially a by-product to the drawing that the wearer is actually choosing to make with their hand. The outcome is a record of the wearer's own individual style of drawing. It captures the physical movements that were made by the hand/wrist while the wearer was focusing on drawing their intended image above.
I hope you enjoy the little video! It contains stills/pans over the outcome drawings (but I'll post images below, too). This is one of my first times at piecing together a video, so that was a fun little extra learning challenge in itself! Here we go:
It would be interesting to develop this idea further by asking different people to test out the device, to see how each persons individual drawing style is recorded by the device. I would imagine that each trait that is natural and instinctive to our individual method of sketching- eg- the angle a person holds their pen at, the speed and force of their marks, the amount of detail/tone, ect, that they choose to include, would all affect the outcome of the device's corresponding drawing.
Perhaps a device like this could help someone analyse their own individual drawing style, through looking at the drawing the device makes of their drawing. I found that even as I used it in these simple experiments, I became more aware and conscious of my own drawing style. I noticed that I tend to pause briefly, and then make a series of marks/shapes in quick succession, before pausing and repeating the process again. The device leads to self-awareness in sketching!
Perhaps a device like this could help someone analyse their own individual drawing style, through looking at the drawing the device makes of their drawing. I found that even as I used it in these simple experiments, I became more aware and conscious of my own drawing style. I noticed that I tend to pause briefly, and then make a series of marks/shapes in quick succession, before pausing and repeating the process again. The device leads to self-awareness in sketching!
drawing machine research
So the task for our next session is to make a 'drawing machine/device'! It's got to be something that produces a drawing aside from the conventional method of putting pen to paper by hand.
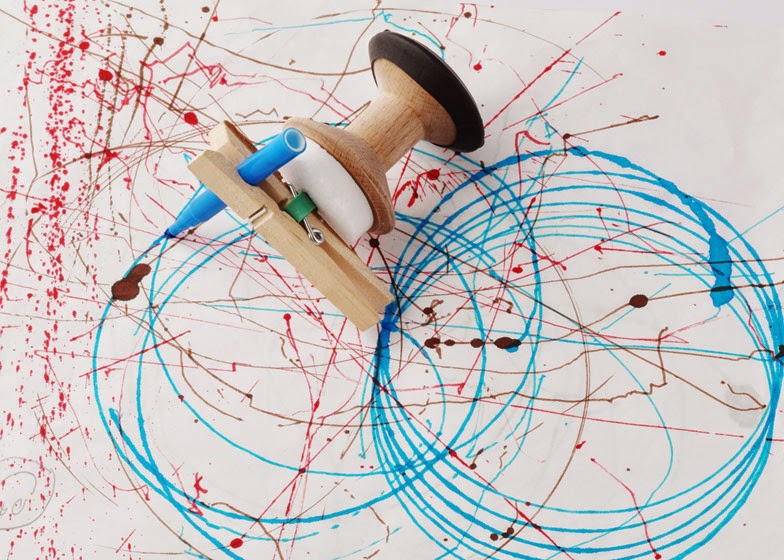
It seems that we, the students of this sketch innovation module, are not the only ones attempting to create devices that create drawings for us. I found this drawing machine on Dezeen magazine's website, which is a simple wind up toy produced by the company, 'All Lovely Stuff' (see http://www.dezeen.com/2012/12/22/drawing-machine-wind-up-toy-by-all-lovely-stuff//). It uses easy to find objects- a clothes peg, cotton reel, felt tip, and rubber band- which are assembled together and then make drawings when the cotton reel is wound up, and let go.
As I continued my research, I got very excited by stumbling across the work of Echo Yang.
You can find her website here. (it's worth a look!)
Yang is fascinated with digital technologies that now allow designers to be driven by computer processes to produce outcomes that aren't completely planned or expected. Rather than having in mind exactly how the end design will look, many users of digital technologies play around with machines, algorithms and software to generate automated responses. However, Yang wanted to apply this 'automated' approach to old analogue technologies. She undertook a series of experiments with various analogue objects that are now considered as 'old technology', using them as implements to draw with. Rather than creating her own algorithms with state of the art technologies, her work exposes and depicts the inner rhythms, functions and workings of old technologies.
I really like how Yang has almost hijacked objects to expose how they work, by using them to create drawings of the functions that they normally would perform. The results are really beautiful, and I think they serve as a great reminder of the wonder of all the objects and world that we take for granted and overlook around us....when really, even the most mundane, day to day objects can produce fabulous things, if we can only see them differently!
I am feeling very inspired. I like this idea of 'drawing' processes that usually go unnoticed, or unrecorded. It would be interesting to experiment with this within my practice in Textiles, perhaps creating some way to record my sewing/ironing/creative process as it happens....
For next session, I already have an idea for my drawing device that I'll present- but this is definitely an area with plenty of potential to explore and delve deeper into!
It seems that we, the students of this sketch innovation module, are not the only ones attempting to create devices that create drawings for us. I found this drawing machine on Dezeen magazine's website, which is a simple wind up toy produced by the company, 'All Lovely Stuff' (see http://www.dezeen.com/2012/12/22/drawing-machine-wind-up-toy-by-all-lovely-stuff//). It uses easy to find objects- a clothes peg, cotton reel, felt tip, and rubber band- which are assembled together and then make drawings when the cotton reel is wound up, and let go.
As I continued my research, I got very excited by stumbling across the work of Echo Yang.
You can find her website here. (it's worth a look!)
Yang is fascinated with digital technologies that now allow designers to be driven by computer processes to produce outcomes that aren't completely planned or expected. Rather than having in mind exactly how the end design will look, many users of digital technologies play around with machines, algorithms and software to generate automated responses. However, Yang wanted to apply this 'automated' approach to old analogue technologies. She undertook a series of experiments with various analogue objects that are now considered as 'old technology', using them as implements to draw with. Rather than creating her own algorithms with state of the art technologies, her work exposes and depicts the inner rhythms, functions and workings of old technologies.
 |
| Alarm clock and pen drawing |
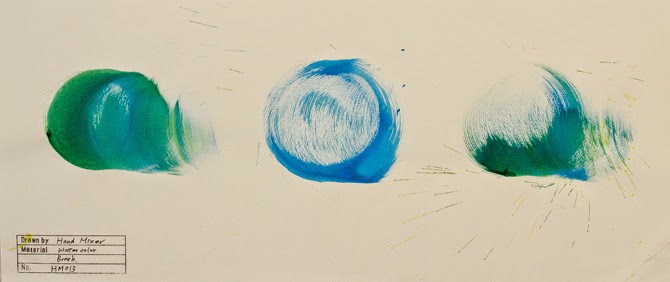 |
| Handmixer filled with watercolour |
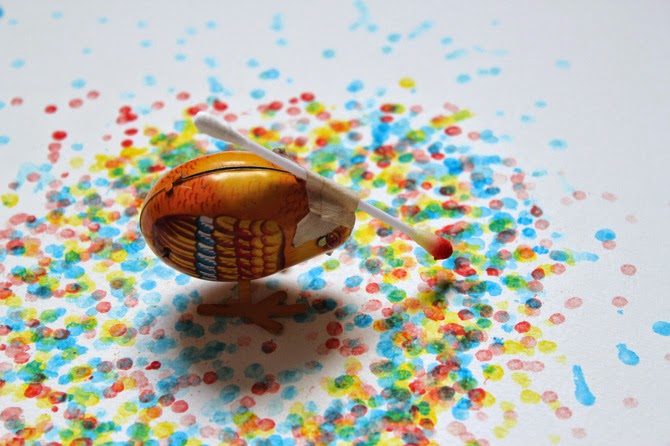 |
| nodding bird drawing (with the help of a cotton bud and paint) |
 |
| Hoover and ink drawing |
I am feeling very inspired. I like this idea of 'drawing' processes that usually go unnoticed, or unrecorded. It would be interesting to experiment with this within my practice in Textiles, perhaps creating some way to record my sewing/ironing/creative process as it happens....
For next session, I already have an idea for my drawing device that I'll present- but this is definitely an area with plenty of potential to explore and delve deeper into!
sketching together
Here's the other 2 drawings that follow on from my previous post!
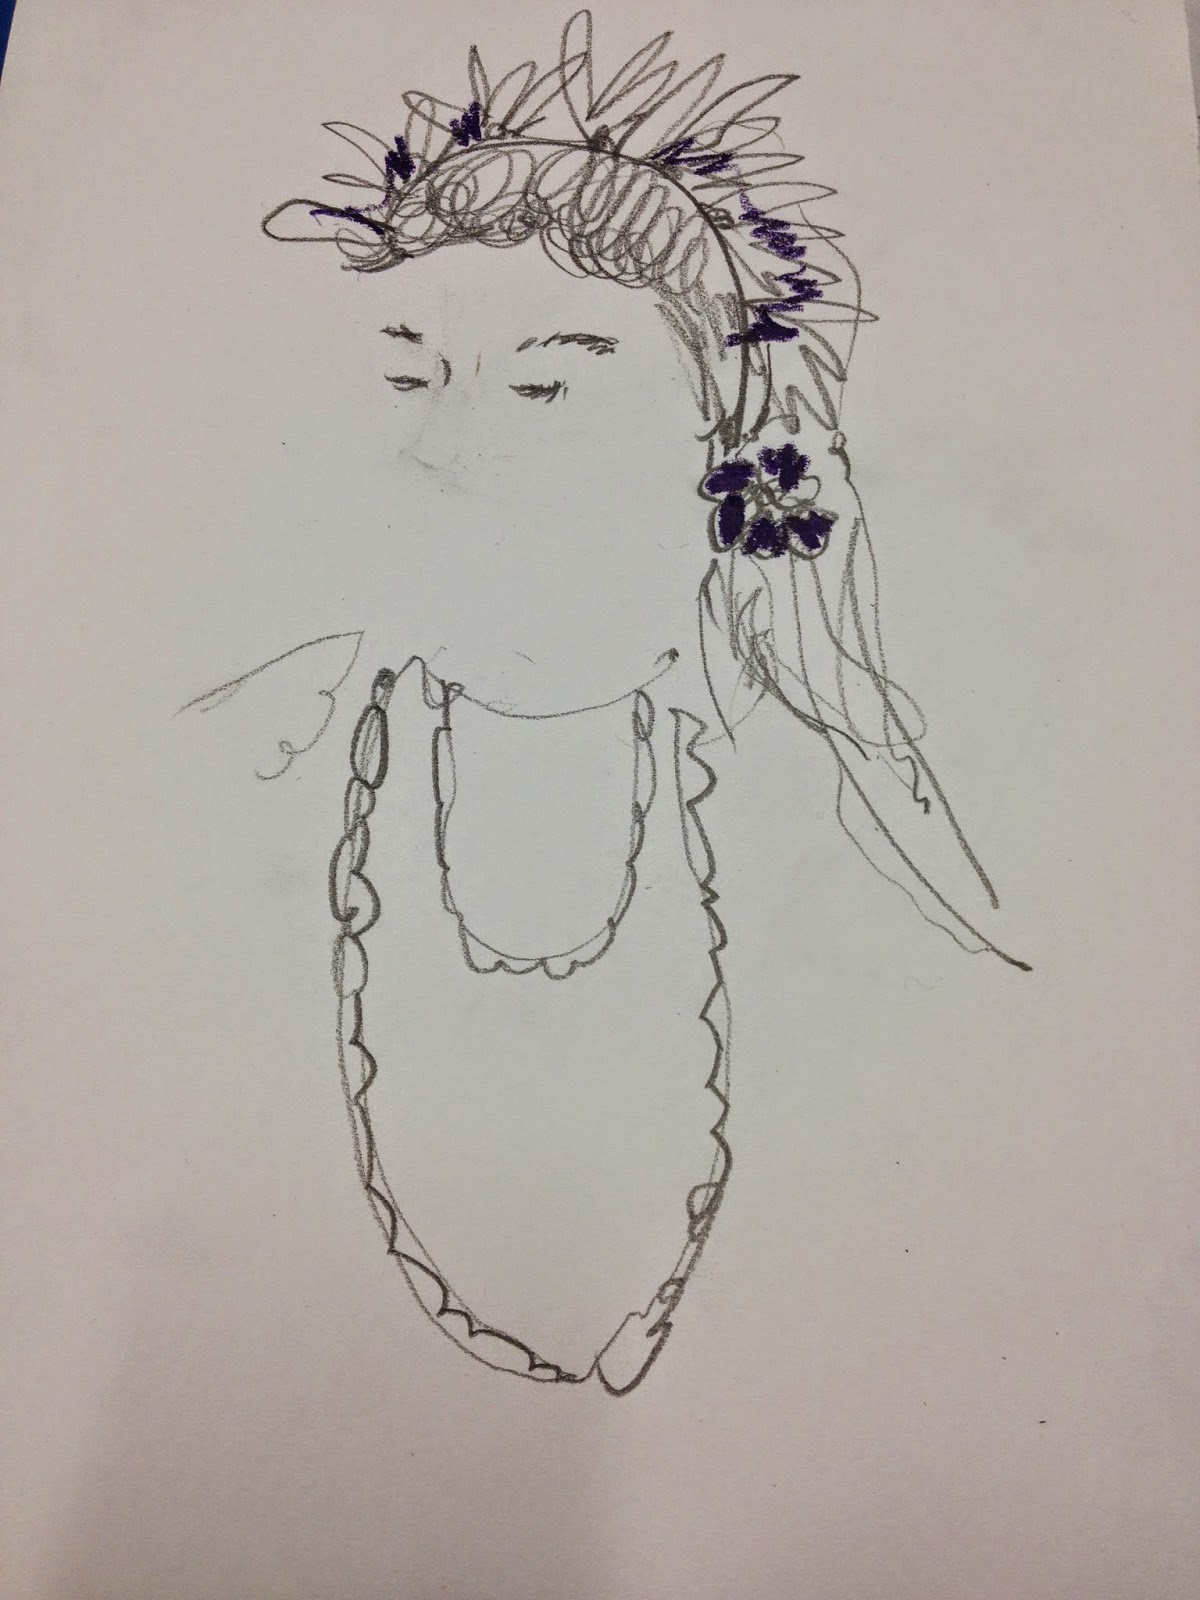
The first is a 2 minute portrait of my very self, drawn by the student sitting next to me in class. I like the energy they captured in their pencil marks, and the addition of a bit of felt-tipped colour to highlight my flower headband and earrings. She apologised that she didn't get to finish my face, but I like the result....perhaps 'unfinishedness' is an aspect of innovation? - Knowing when to leave a piece incomplete, with the possibility of being worked into at a later date, or simply to place emphasis on what is present, through the absence of the missing details... I also think this drawing makes me look a bit like some kind of tribal princess, it's slightly Pocahontus-esqe. I have never been drawn in this way before, and I quite like it!
Secondly, this was my collaborative 'mapping' drawing of Chelsea, made with Katie in the medium of fine liners and coloured pencils. Looking at both of the maps we'd drawn individually (you can see mine at the end of the post below this), we realised that we had mapped in a similar way, both choosing to depict a birds eye view looking down over the college campus. So, with this shared perspective, we decided just to make our collaborative drawing simultaneously, both drawing on the paper at once, to see how it would turn out. We discussed the direction/orientation and scale very quickly, and then set to work. As Katie had previously been drawing in fine liner, she began marking out various buildings on our paper, and I naturally started adding details and colour with my coloured pencils. I was actually quite amazed at how smoothly and easily our collaboration worked- despite the fact that the paper was only A4 sized, our hands worked around each other as we drew rather than getting in each others way, and each time one of us rotated the paper, the other responded by simply working on a different section of the map. I enjoyed the pace of this collaborative drawing exercise, and I think it can be quite refreshing to co-draw/co-design with another.
It reminded me of a print workshop we had in our Textiles Practice at the start of term, where I was learning about flocking and foiling techniques with another 2 students in my group. To test out the techniques, we made a few samples together, with one person picking a screen, another person selecting fabric, and I layed the flock and foil papers out for us to print with. Our final print was a fun combination of each of the different elements we'd selected and brought together. I'd cut some squares of flocking paper up and placed them ontop of certain sections of the final layer of print, and the other 2 students laughed and said that they never would have thought to try that if they'd been designing individually. I think this example, alongside my collaborative sketch experiment with katie today, just shows how designing with other people can lead to 'innovation'- both in your approach of how you adapt your way of working to logistically accommodate another person in the process, and also result wise, as you have collective input that comes together to form something you couldn't or perhaps wouldn't produce alone.
The first is a 2 minute portrait of my very self, drawn by the student sitting next to me in class. I like the energy they captured in their pencil marks, and the addition of a bit of felt-tipped colour to highlight my flower headband and earrings. She apologised that she didn't get to finish my face, but I like the result....perhaps 'unfinishedness' is an aspect of innovation? - Knowing when to leave a piece incomplete, with the possibility of being worked into at a later date, or simply to place emphasis on what is present, through the absence of the missing details... I also think this drawing makes me look a bit like some kind of tribal princess, it's slightly Pocahontus-esqe. I have never been drawn in this way before, and I quite like it!
Secondly, this was my collaborative 'mapping' drawing of Chelsea, made with Katie in the medium of fine liners and coloured pencils. Looking at both of the maps we'd drawn individually (you can see mine at the end of the post below this), we realised that we had mapped in a similar way, both choosing to depict a birds eye view looking down over the college campus. So, with this shared perspective, we decided just to make our collaborative drawing simultaneously, both drawing on the paper at once, to see how it would turn out. We discussed the direction/orientation and scale very quickly, and then set to work. As Katie had previously been drawing in fine liner, she began marking out various buildings on our paper, and I naturally started adding details and colour with my coloured pencils. I was actually quite amazed at how smoothly and easily our collaboration worked- despite the fact that the paper was only A4 sized, our hands worked around each other as we drew rather than getting in each others way, and each time one of us rotated the paper, the other responded by simply working on a different section of the map. I enjoyed the pace of this collaborative drawing exercise, and I think it can be quite refreshing to co-draw/co-design with another.
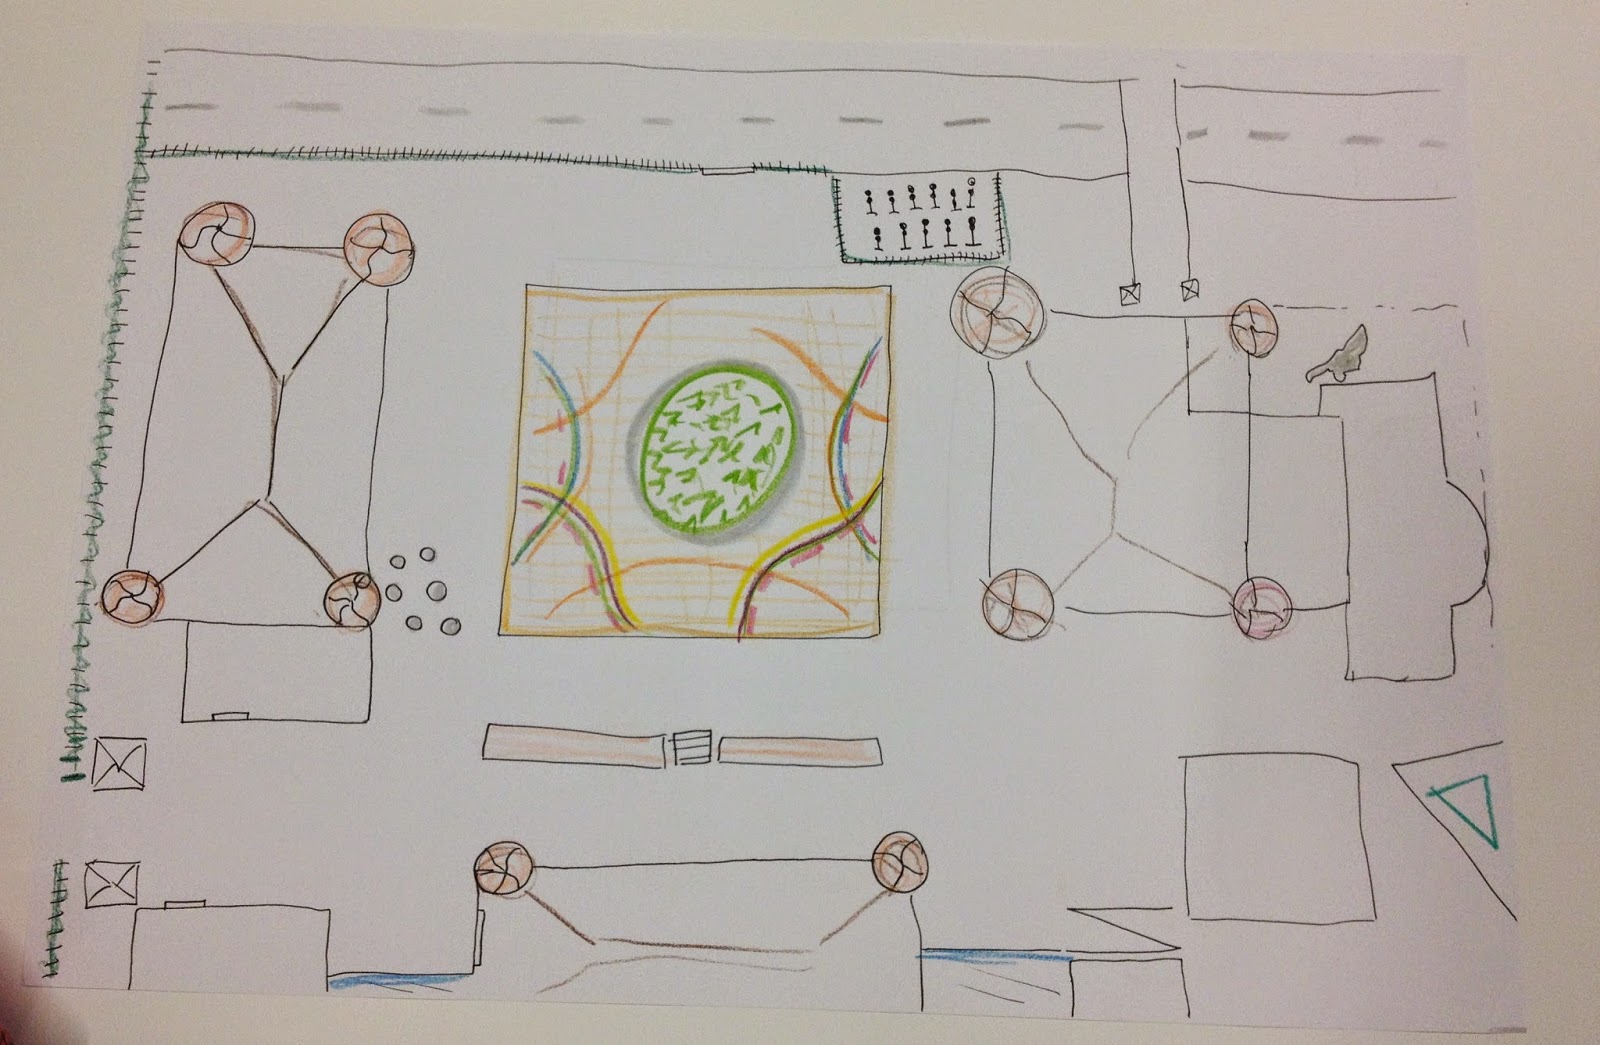 |
| A collaborative drawing of Chelsea with Katie. |
Subscribe to:
Posts (Atom)